
See below for how to navigate Web Help Desk to create a ticket.
Here are a few things to remember when creating a Ticket.
- Create your own tickets
- Unless you are unable to log in
- If you cannot log in:
- Have your DC put in a ticket to get your login corrected
- Call x5050 or your building’s Help Desk Line to get a ticket generated for you
- Read the instructions when creating a ticket to make sure your ticket is correctly routed.
First, make sure you are on the Request page after logging in. The Request button at the top of the Web Help Desk toolbar will bring you to this page.
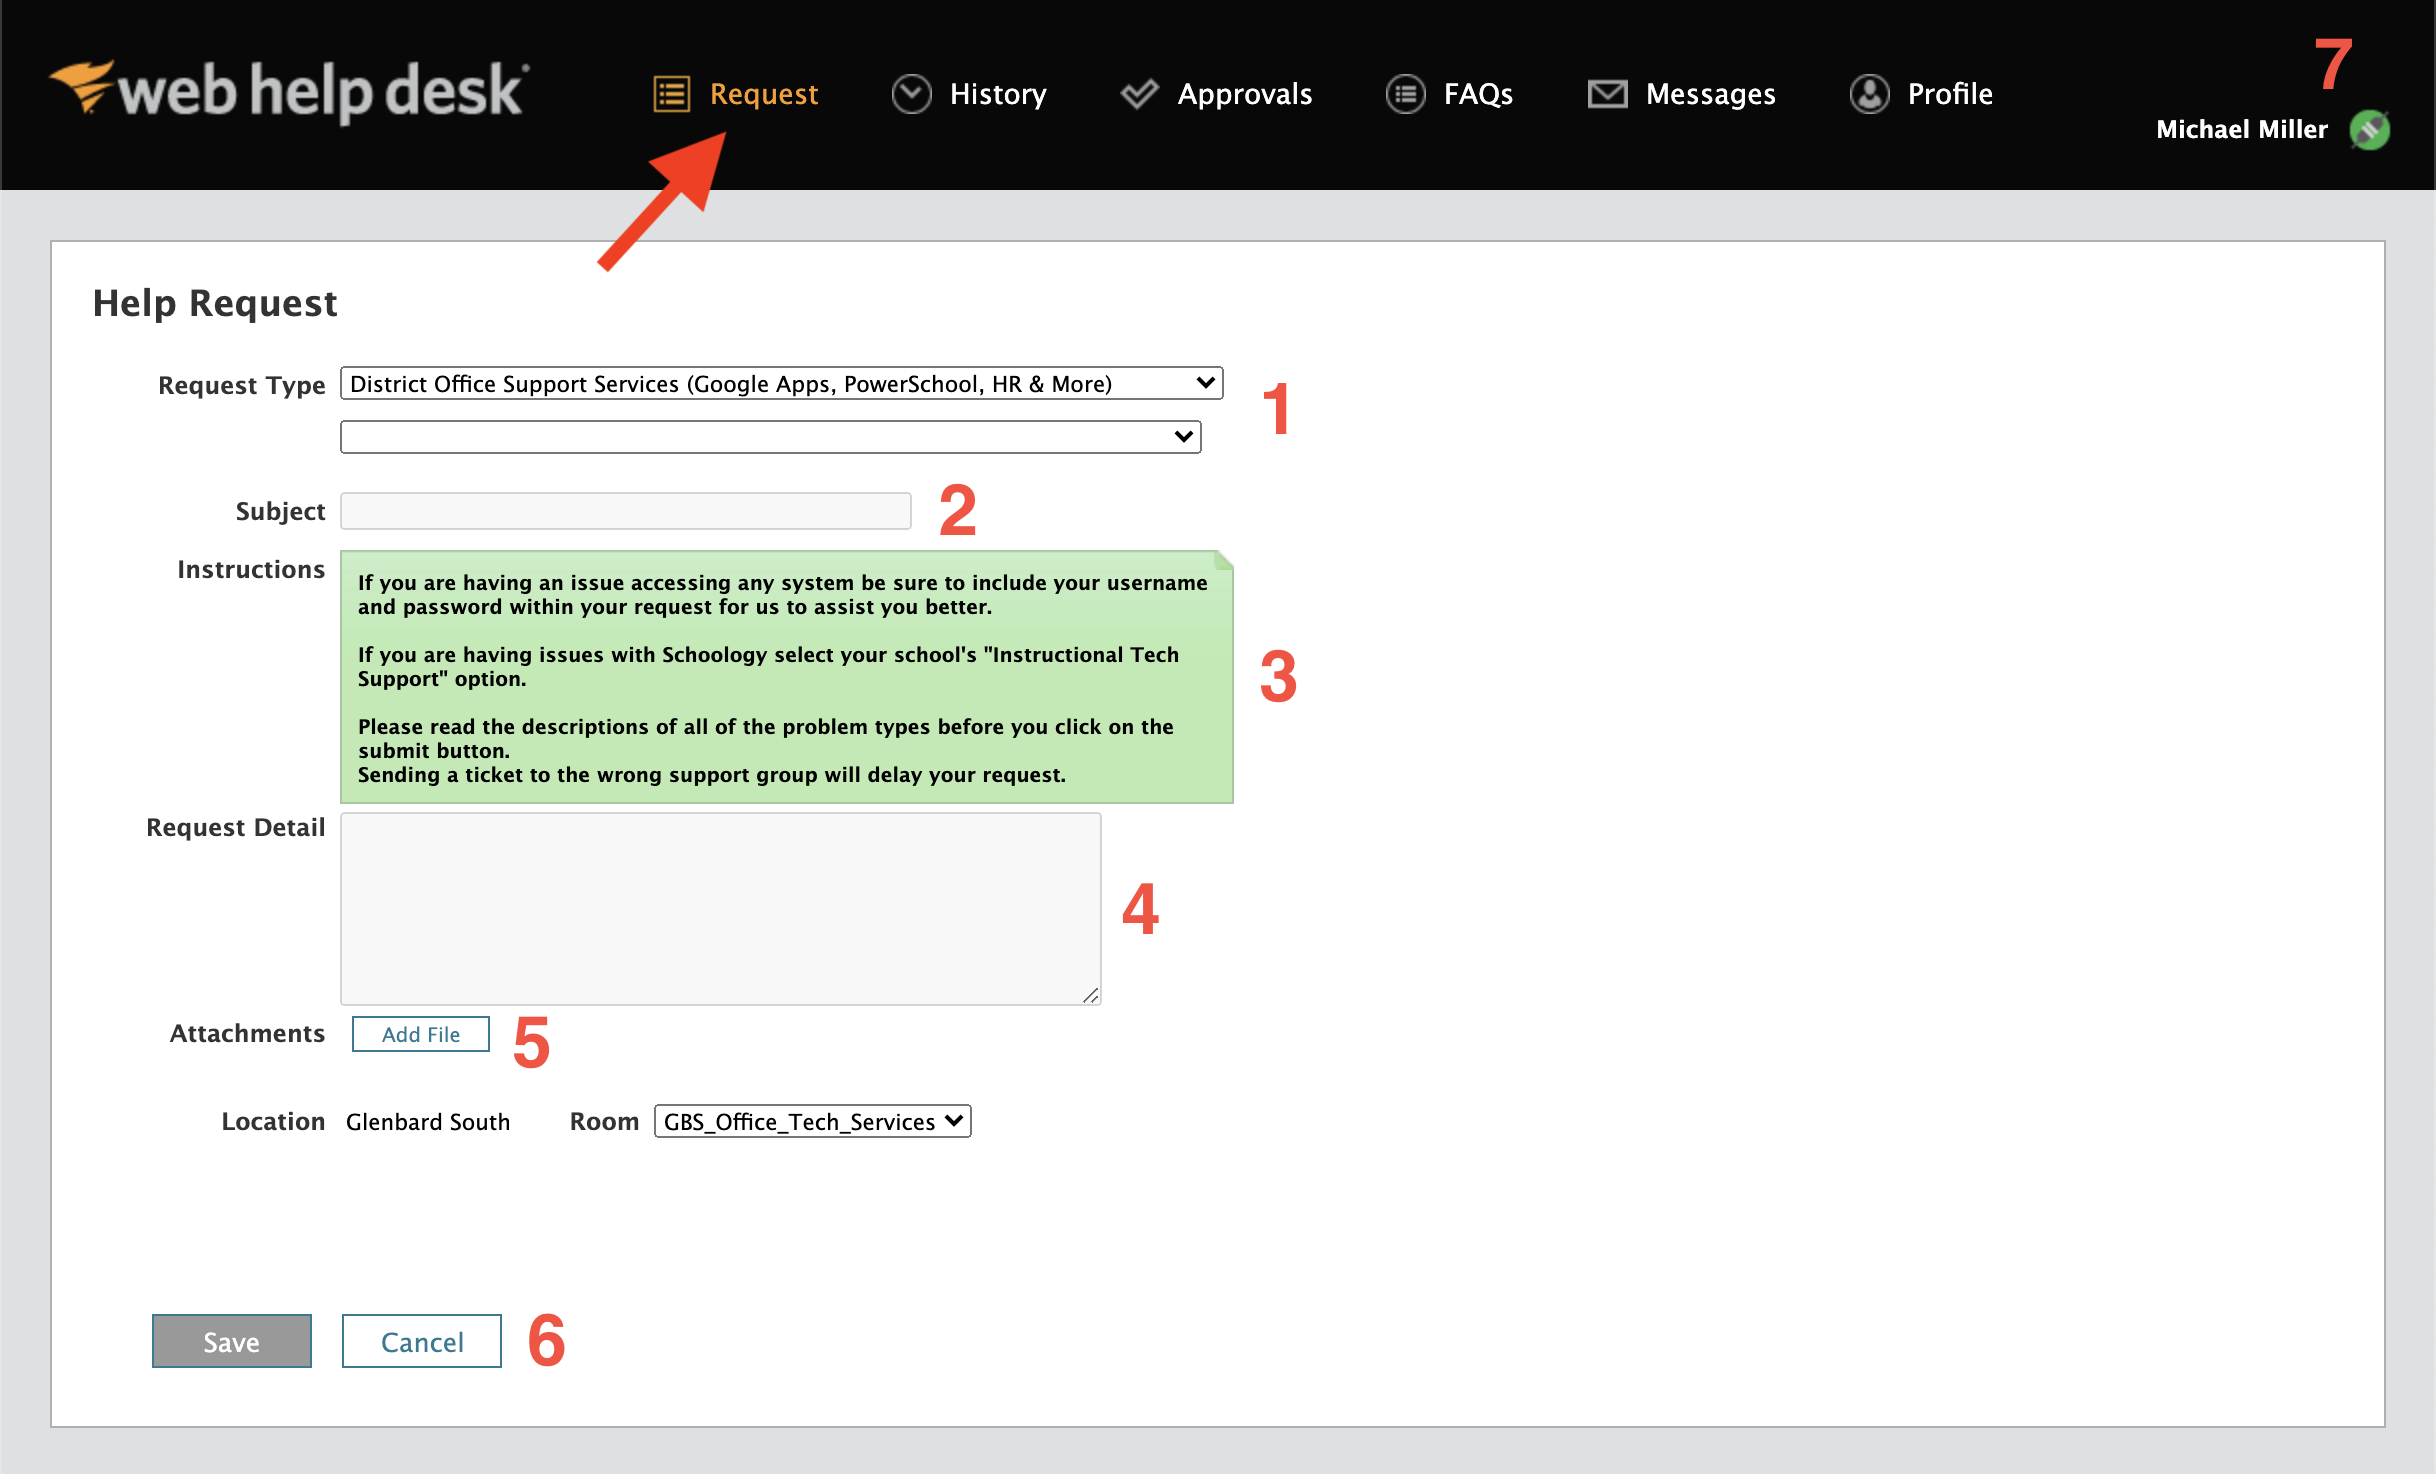
1. Request Type
Choose the correct Request Type according to your issue. (All Request Types have detailed descriptions for when to use them.) Some Request Types will create a second or third drop-down box with additional options. You must select an option from all drop-down boxes in order to submit the ticket.
For more clarification on request types see:
Web Help Desk – Request Types
2. Subject
Enter a descriptive title for the issue
3. Please Read!
This green box displays details on when it is best to use the Request Type you have chosen. (Please read the descriptions if you are not already familiar with them. There will be a delay if your ticket is routed incorrectly.)
4. Request Detail
Include detailed information about the issue. Please be as descriptive as possible.
5. Attachments
Click the Add File button to add an attachment to the ticket. (This is useful for adding screenshots of error messages or other information that can be helpful for a Technician to assist with a help request.)
6. Cancel & Save buttons
Cancel button: Cancels the ticket. Your request will not be submitted.
Save button: Saves & Submits the ticket. The button will only be active if the Request Type is completed. Additionally, the ticket can saved only if the Request Detail has been filled out.
7. Currently Logged-On User
This should always show your first and last name (or the name or your account). Log off from Web Help Desk if this account does not belong to you.
To log out:
- Move your mouse cursor over the round, green button next to the user name in the upper right corner.
- The button will turn red.
- Click the button to log out.