When large amounts of data need to transferred into PowerSchool, Data Specialists use the importing process.
The import process is irreversible.
Always try your import on the test server first before importing to Production.
- Create a spreadsheet in excel of the info you want to import.
- Make sure you have the student number in the spreadsheet.
- Make sure all column headings are correct
- Save the spreadsheet as “Tab Delimited”
- Make sure all information is correct. If you import it and it is wrong the info will have to be corrected by hand.
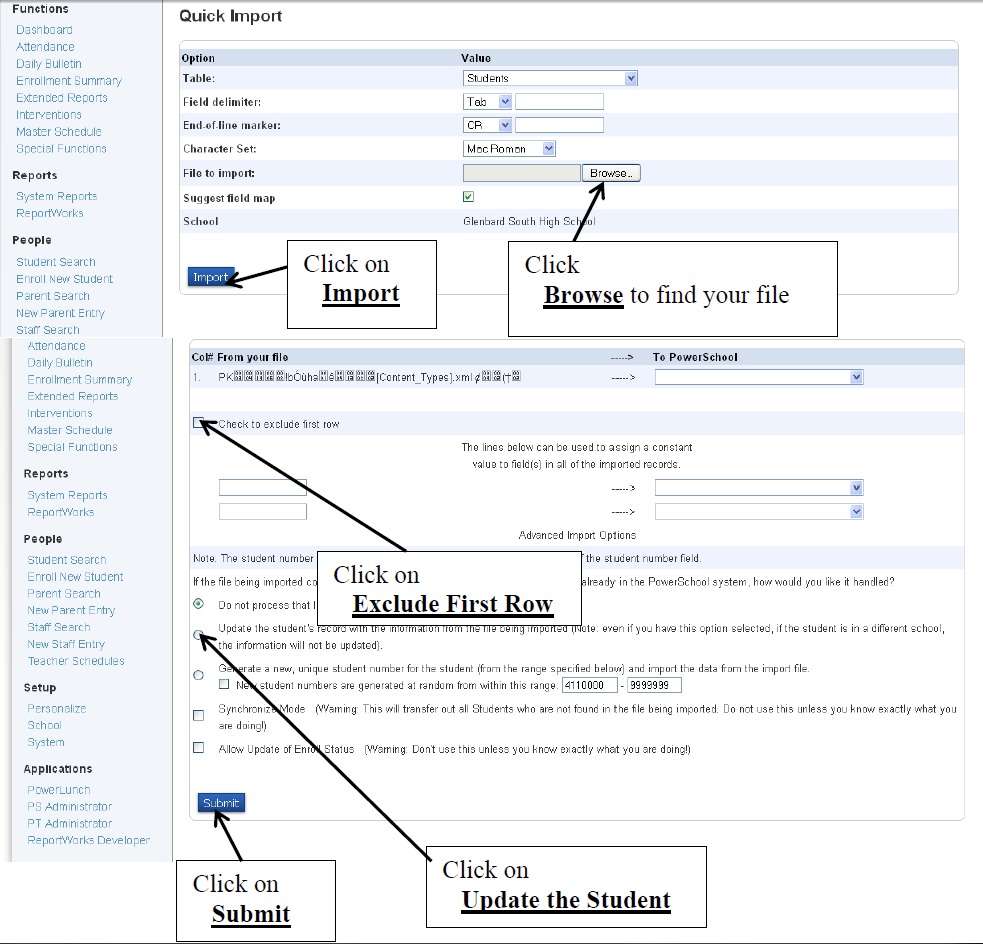
- Click on Special Functions under Functions in the navigation menu.
- Click on Importing & Exporting from the Special Functions menu
- Click Quick Export
- On the Quick Export screen, choose the Table to import to (typically Students)
- Click the Browse button to locate the file on your computer to be used in the import
- Click on the Import button.
- On the next screen, verify that all of the columns from your file (listed on the left) match a PowerSchool field (listed on the right).
- Click the Exclude FirstRow checkbox
- Click the Update the Student’s Record radio button unless you are only importing brand new students.
- Click the Submit button.
