New students must have a student statistical sheet completed. When the Data Department receives the student statistical sheet, all items have already been confirmed such as name, birth date, residency, etc., and the student can be entered into PowerSchool as a new student.
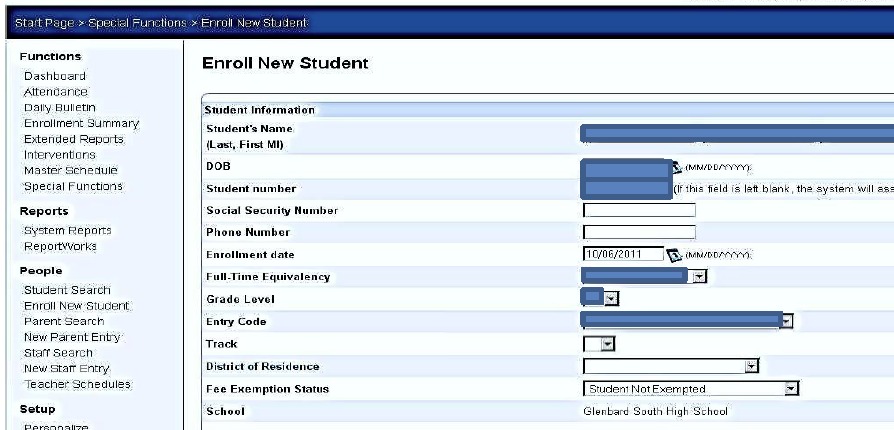
- Click on Enroll New Student
- Fill in the fields highlighted in blue as noted below:
- Student’s name (Format: Last, First M)
- DOB or Birth Date (Format: MM/DD/YYYY)
- Student Number (This is the student’s unique Glenbard student ID number. Note: It is VERY important that this number is never changed once it is first set.)
- Full-Time Equivalency or FTE (read more in the Membership article)
- Grade Level
- Entry Code!!!!! Add more to this description!!!!
- Once the student is added to PowerSchool, you will need to fill out five additional screens as pictured here.
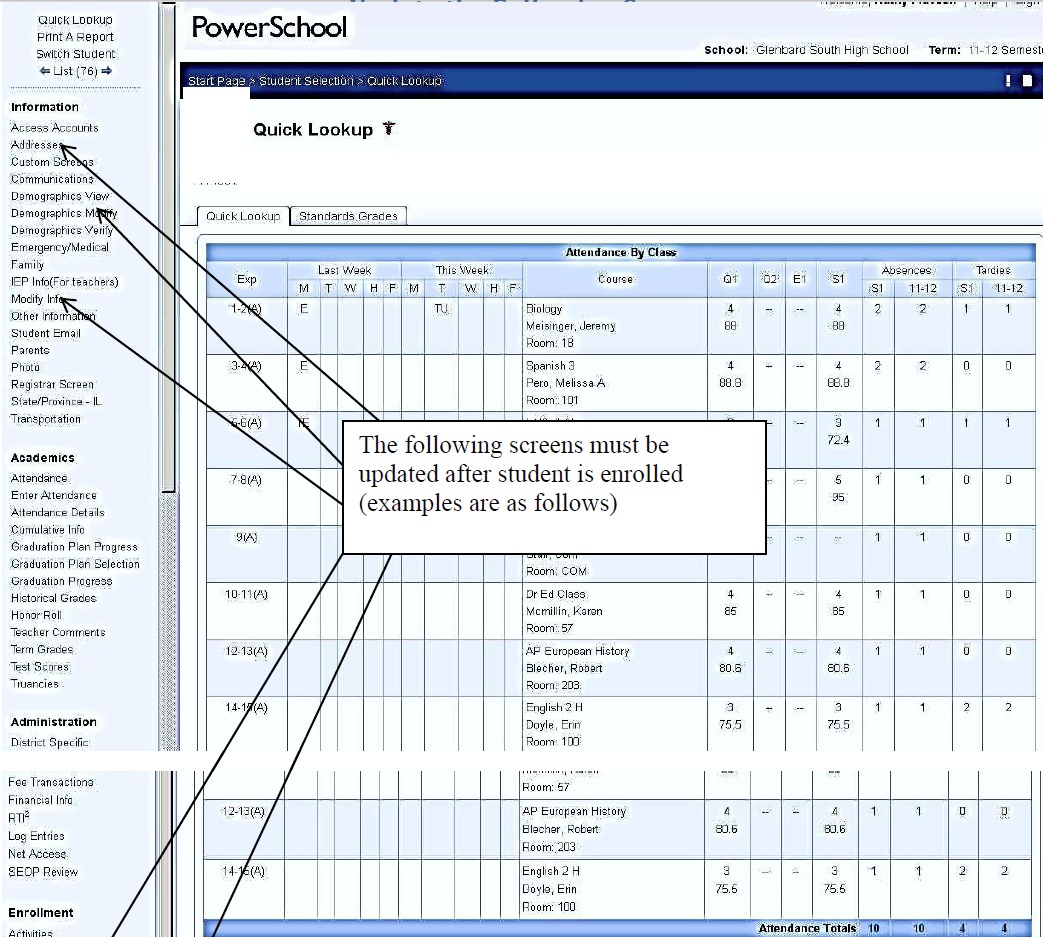
- Screen 1: Click on Demographics Modify from the navigation menu.
- Then click Verification Beta Screen.
- Fill out the screen as seen here. Fill out the orange sections, at least 1 emergency contact (if blank put a parent in), and all student information (green sections).
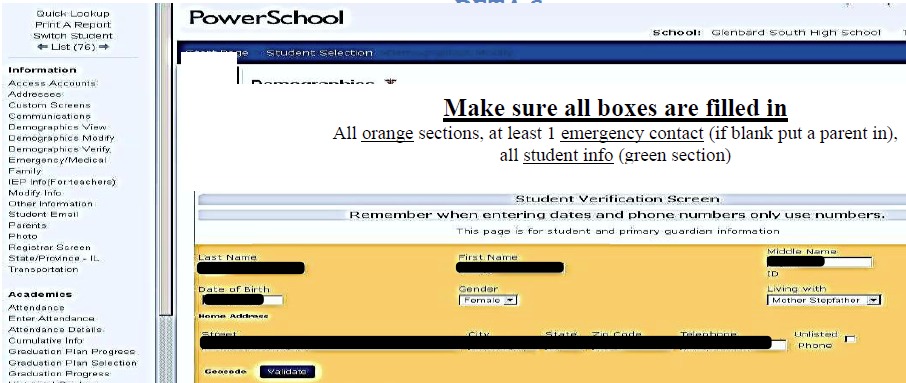
- Click Submit.
- Screen 2: Click on Addresses from the navigation menu.
- If Residency is proven make sure the Residency Confirmed box is checked and click Submit.
- Screen 3: Click on Addresses from the navigation menu.
- Click on date under current enrollment.
- Add a comment and click Submit. (If new start comment with “New -“).
- Screen 4: Click on State/Province – IL from the navigation menu.
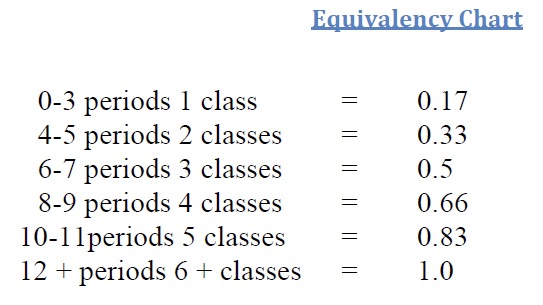
- Update the Full Time Equivalent – FTE on the IL Demo tab for the current enrollment. The value is always 1.0.If the student has multiple enrollments (2 or more serving schools) the total of the enrollments (IL_FTE) must = 1.00.
- Update the Membership Share on the IL General tab for the current enrollment and click Submit (see the chart for conversions)
- If the student speaks another language at home then both the Home Language and Native Language codes must be the updated.
- Click Submit.
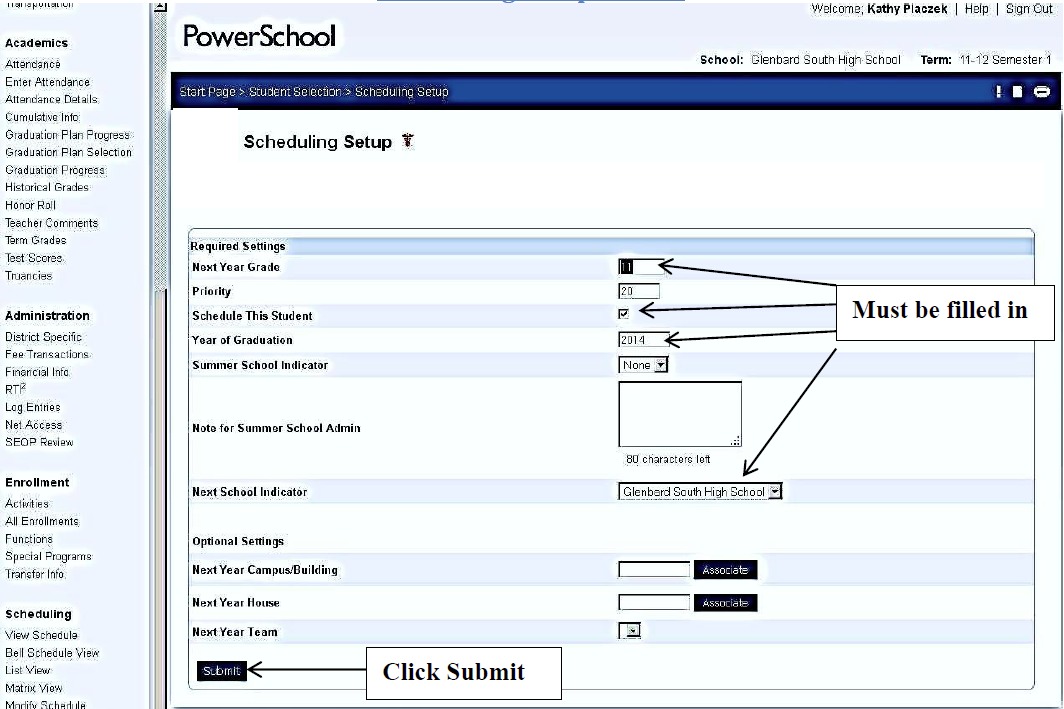
- Screen 5: Click on Scheduling Setup.
- Fill in the following fields:
- Next Year Grade, Priority
- Schedule This Student
- Year of Graduation
- Next School Indicator
- Click Submit.