How to Setup Up a Request Screen
This article will provide a step-by-step guide to set up a request screen. For more information on the request screen please go here.
To setup a request screen is done in PowerScheduler. If PowerScheduler is available on the admin PowerSchool home screen, below are instructions to adjust or create request screens.
Adding a New Requirement
- Log into PowerSchool
- Click PowerScheduler (if available)
- Access to PowerScheduler is not available to all staff members.
- To gain access please request access from you APO
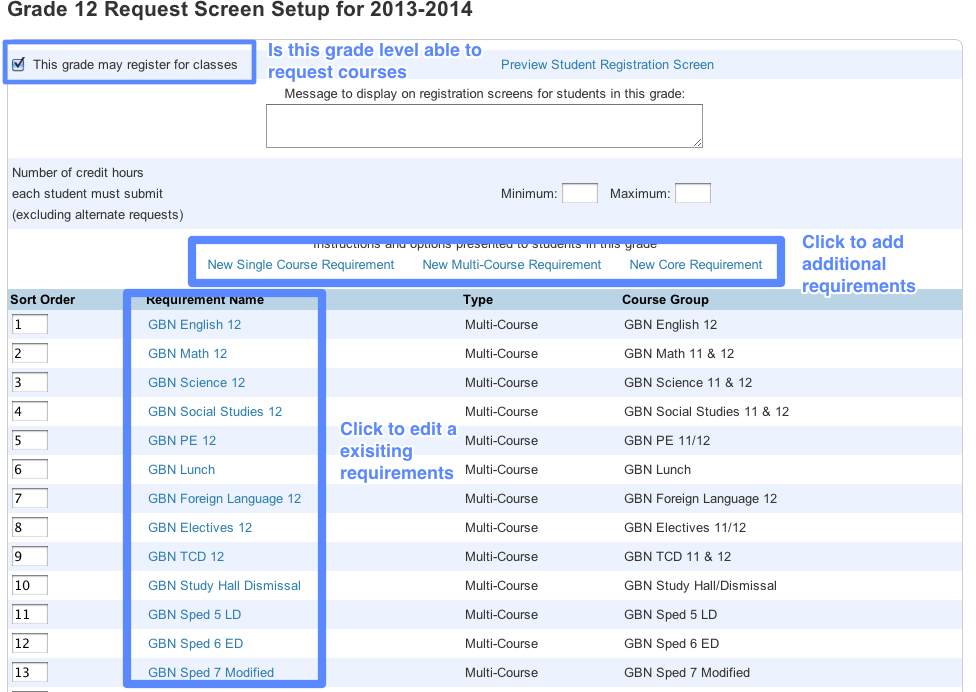
- Click on screen setup

- Click on the grade level that needs the new requirement
- Click the new type of requirement. For description on each type click here
- Fill out all options. All options are required
- Click “Submit”
Adjusting an Existing Requirement
- Log into PowerSchool
- Click PowerScheduler (if available)
- Access to PowerScheduler is not available to all staff members.
- To gain access please request access from you APO
- Click on screen setup
- Click on the grade level that needs the new requirement
- Click the name of the requirement that needs to be adjusted
- Adjusted the fields
- If a course is missing from a requirement, adjust the course group assigned not settings of the requirement. For information on course groups click here.
Activating a Screen
If a screen has the following message “This grade level may not request classes at this time.“, that next year grade level for the student is not activated.
- Decide which grade level the student will be going into next year (ie currently 9th grades will be 10th graders next year)
- Click PowerSchool in the top left corner
- Click PowerScheduler (if available)
- Access to PowerScheduler is not available to all staff members.
- To gain access please request access from you APO
- Click on screen setup
- Click on the grade level that was determined in step 1
- Check “This grade may register for classes” to enable the the screen

- Click submit