Submitting Online Pay Vouchers With the Skyward Mobile App
by Nick Collazo · January 31, 2022
Entering Time Tracking Transactions
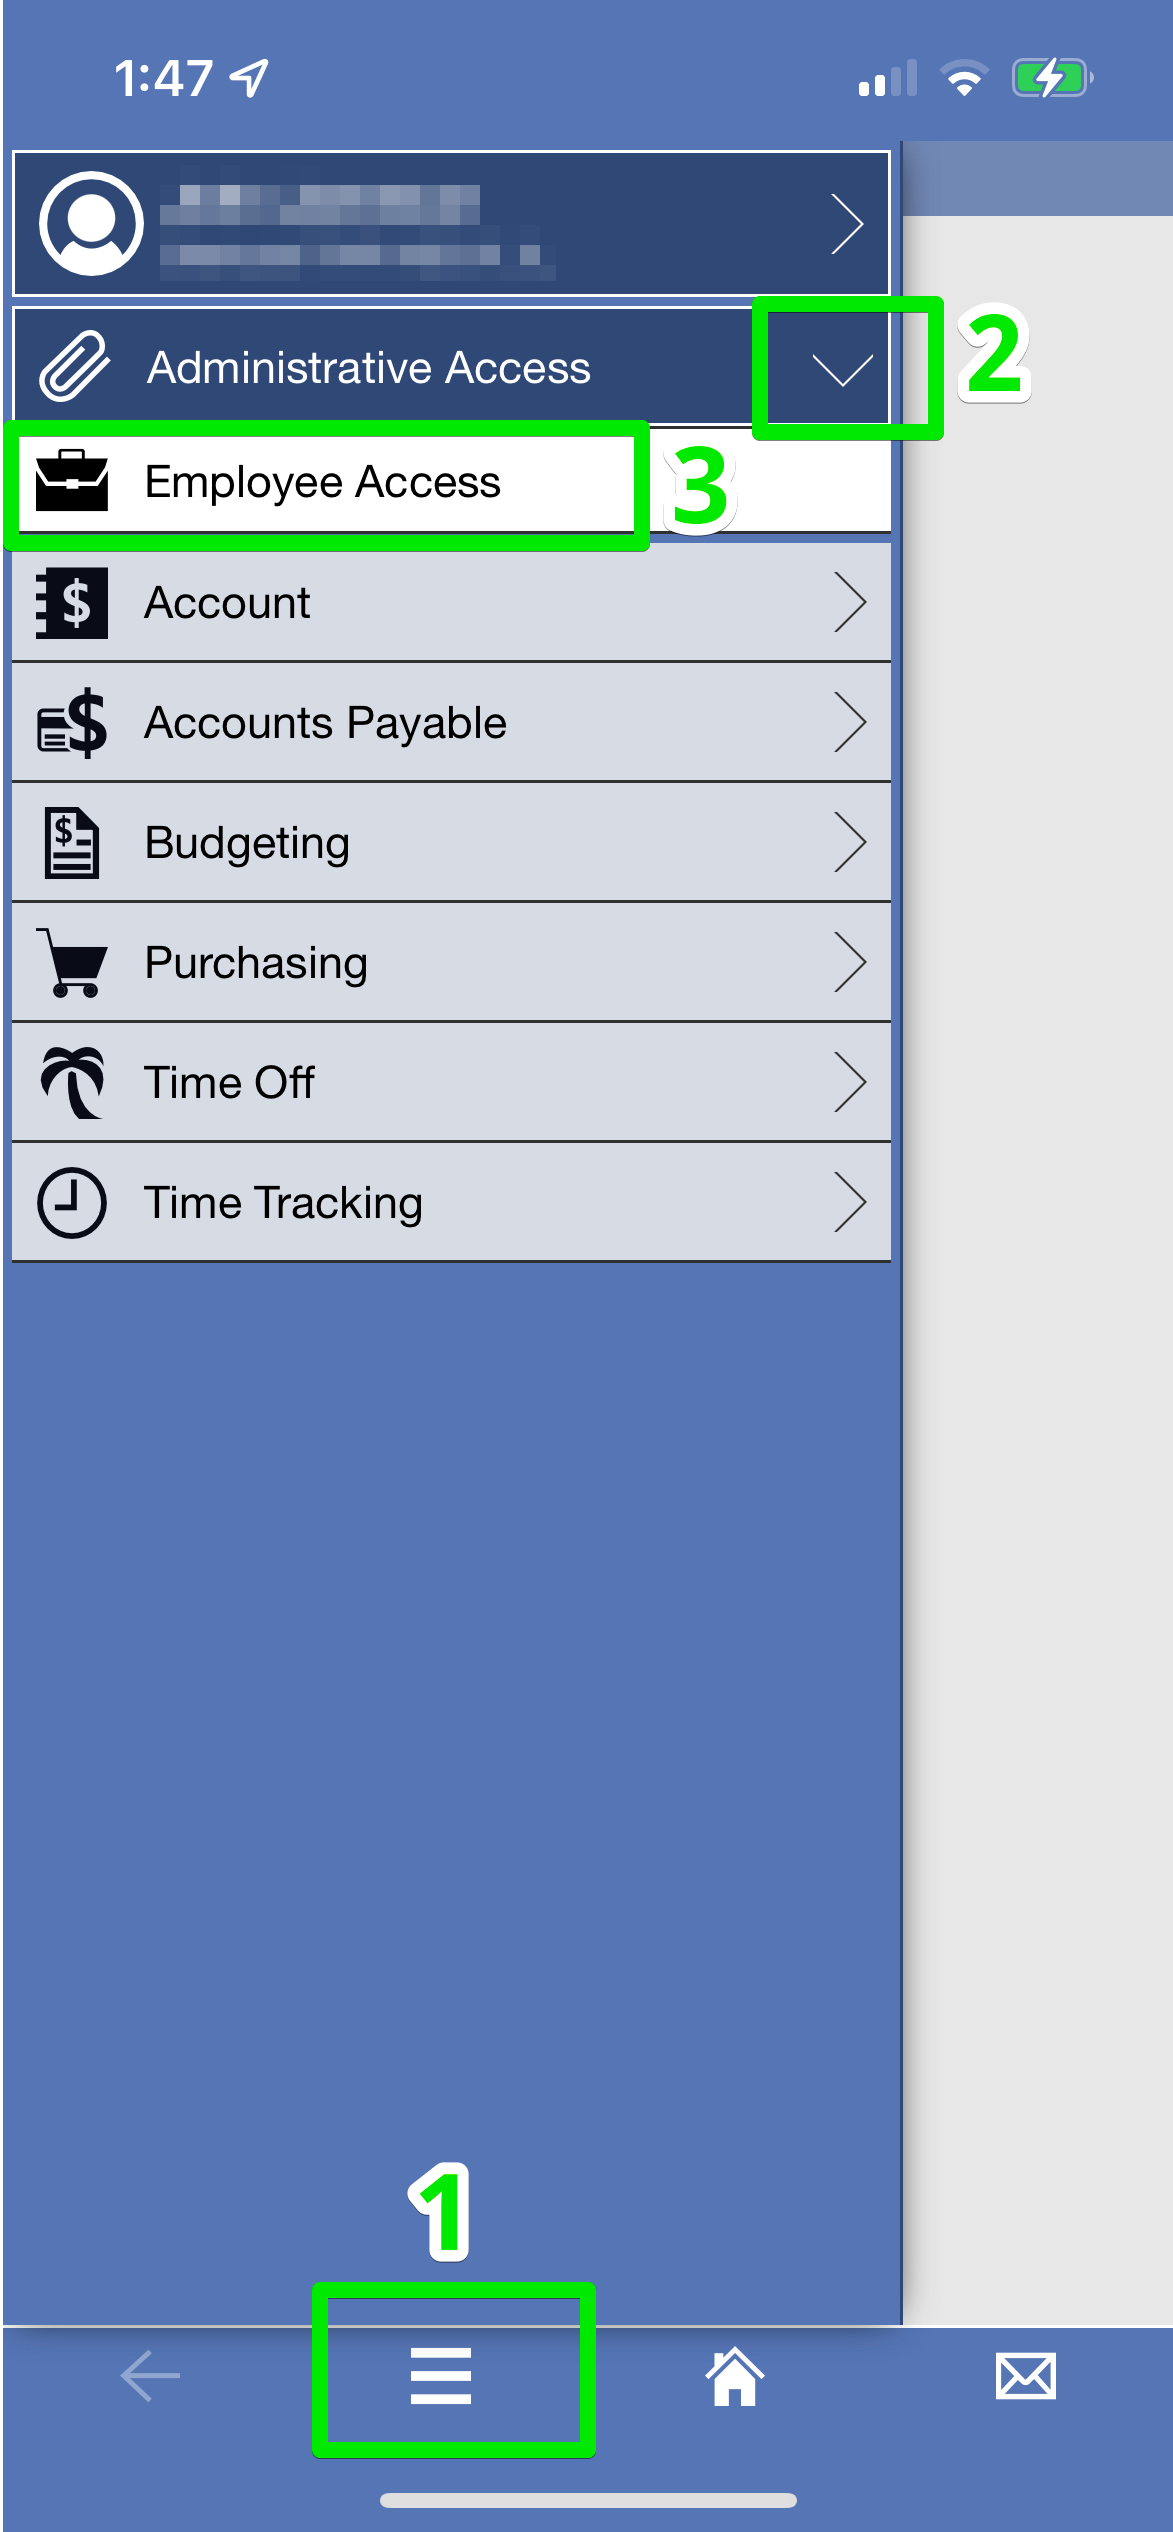
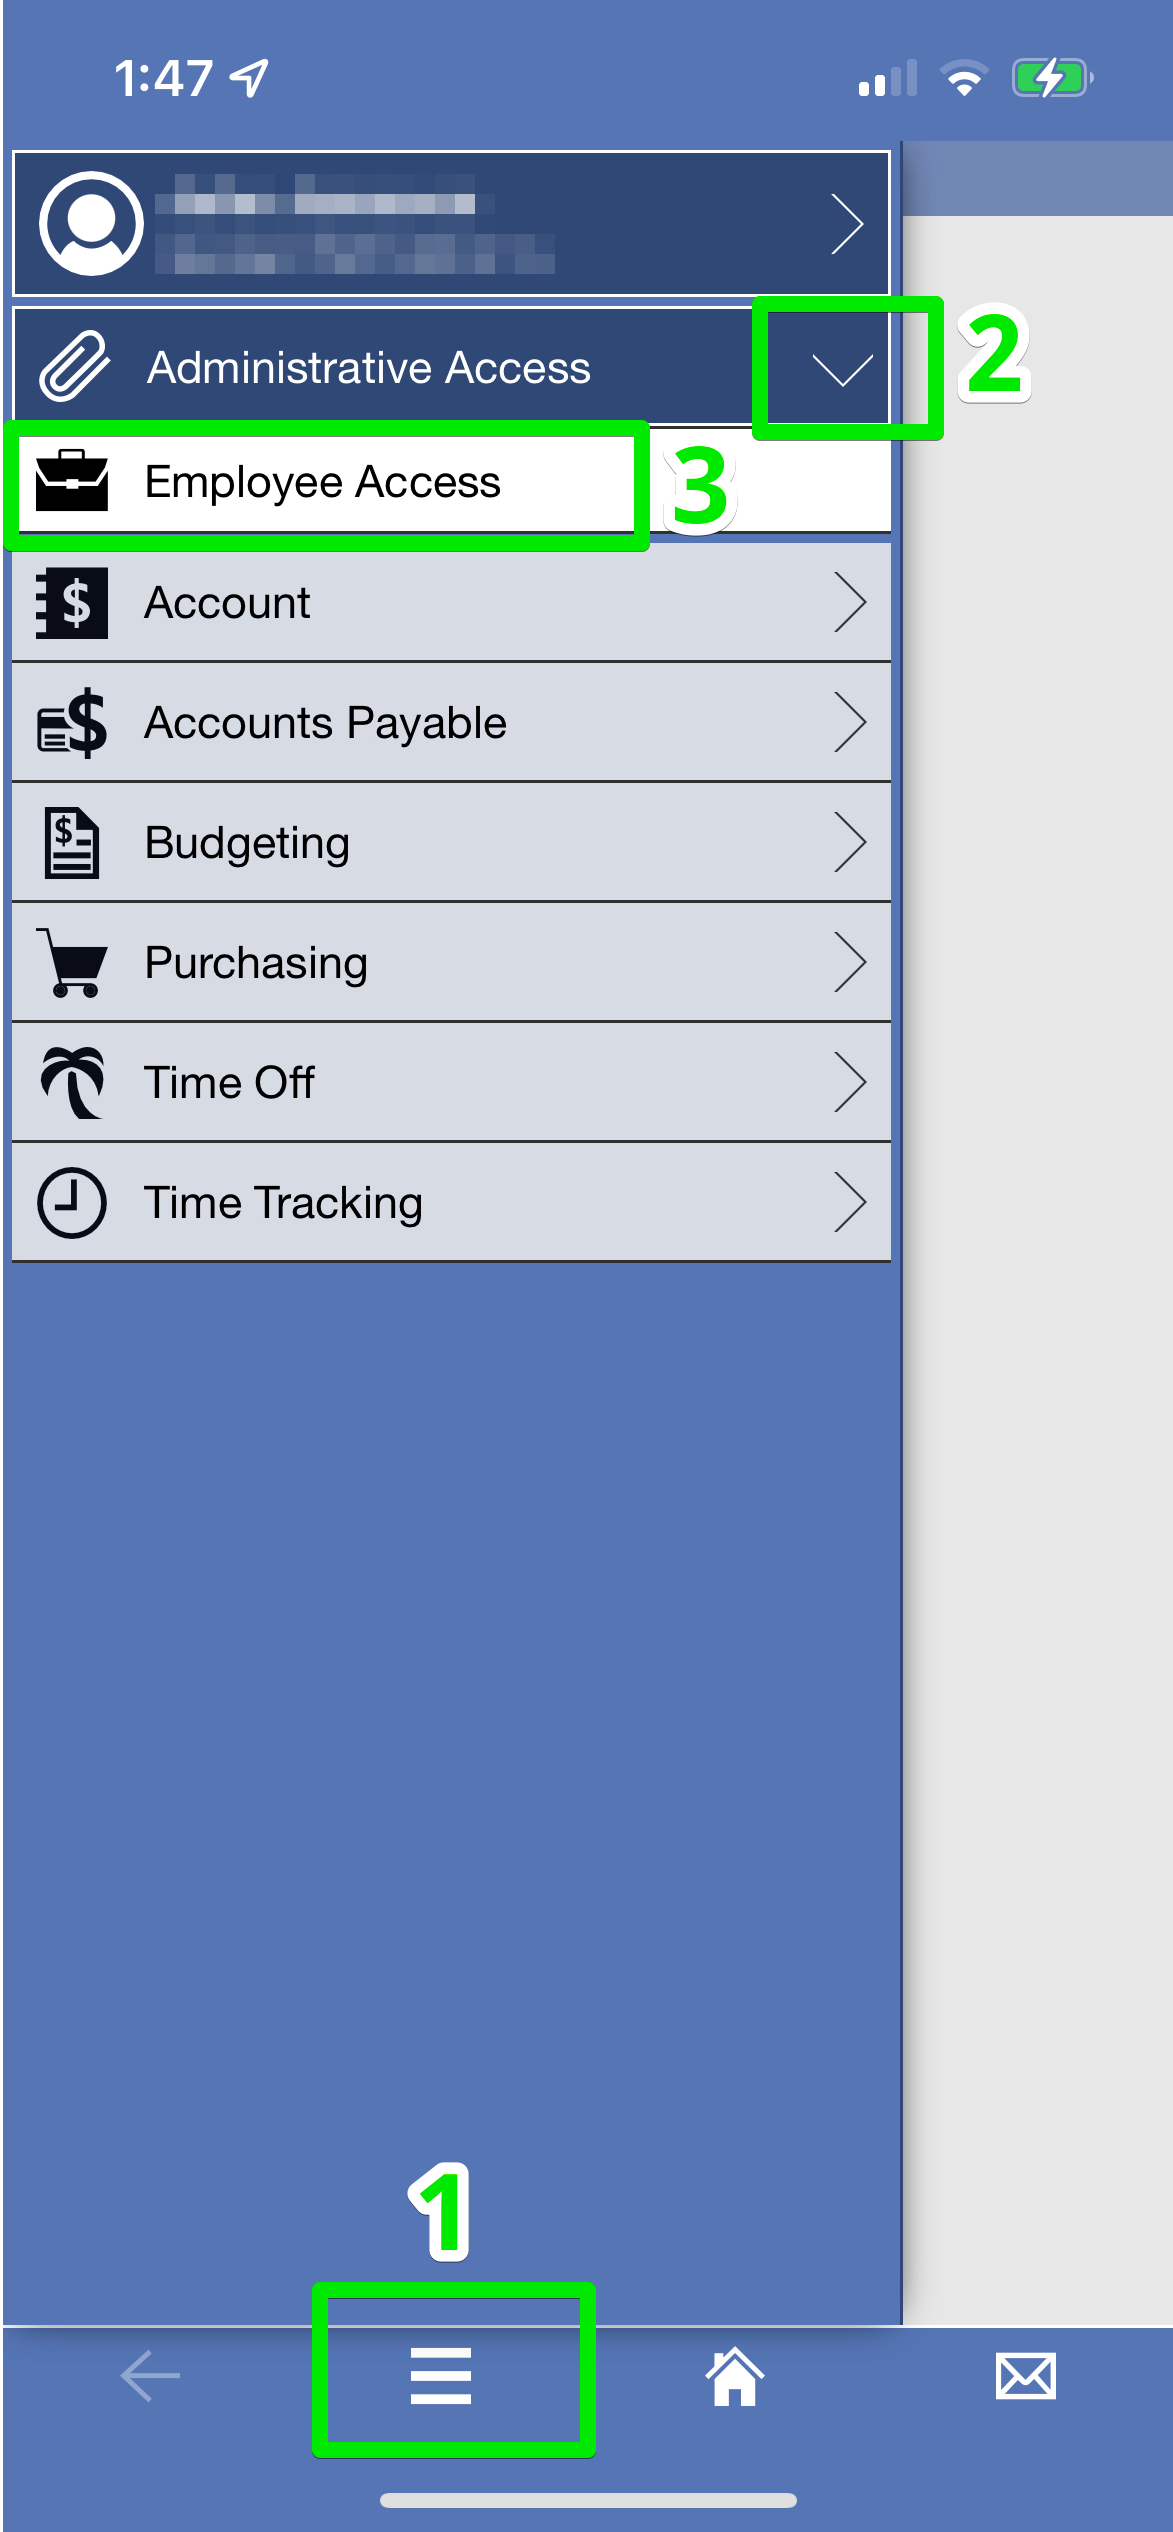
- From the app’s main page, click the menu button at the bottom of the app (1). Verify that you are on Employee Access (3). If on Administrative Access, click the dropdown menu and select Employee Access (2).
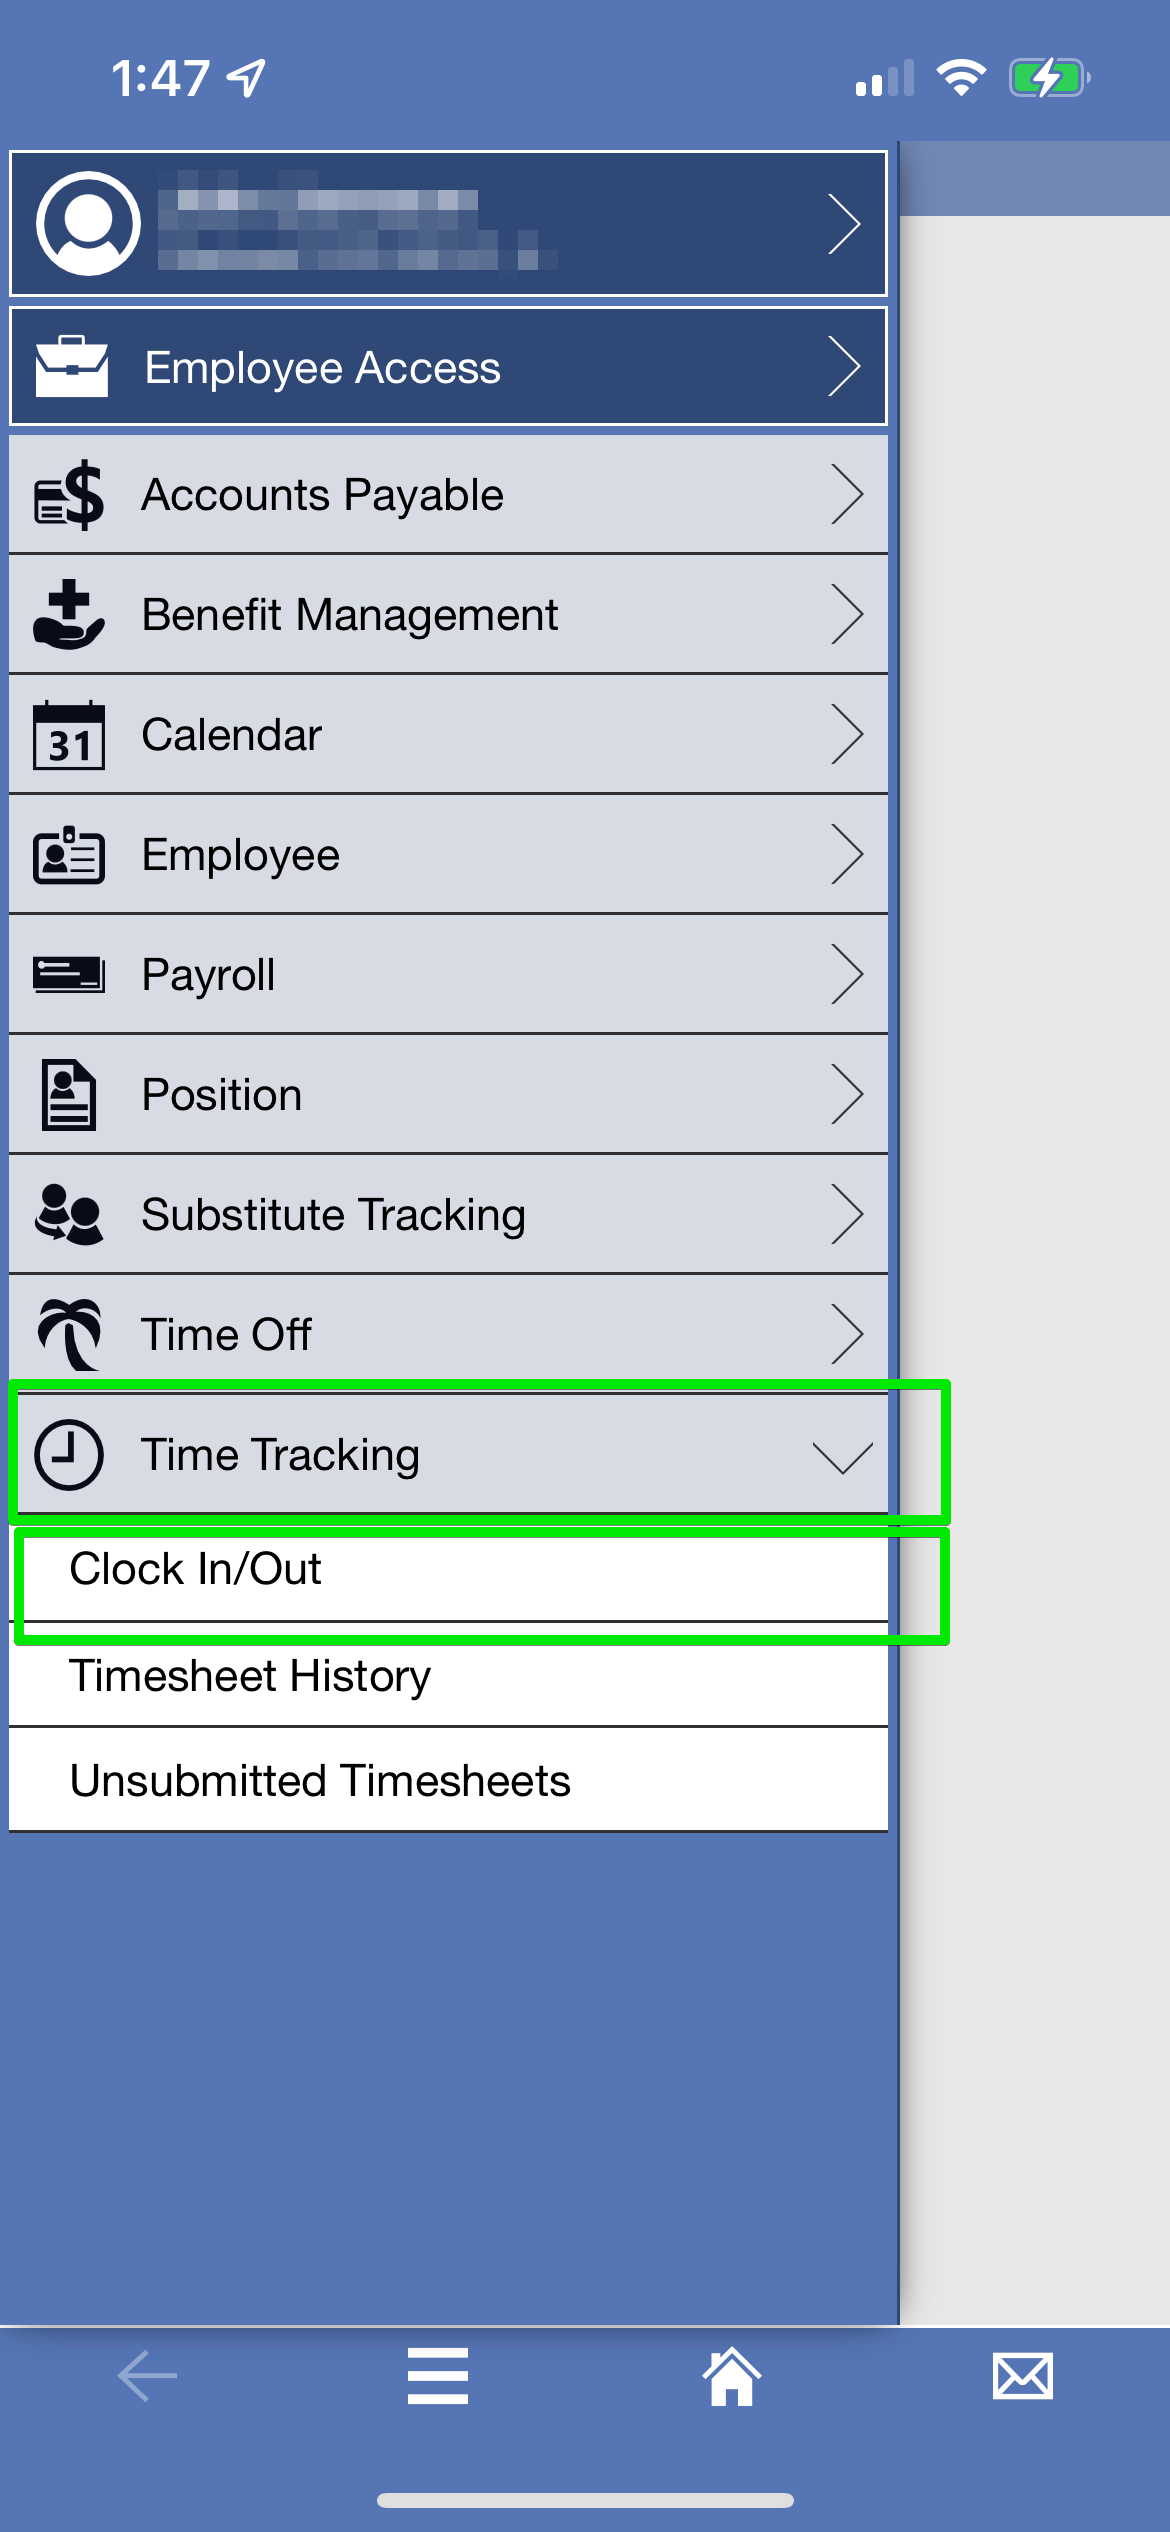
- On the Employee Access menu, click the dropdown next to Time Tracking. Once expanded, click Clock In/Out.
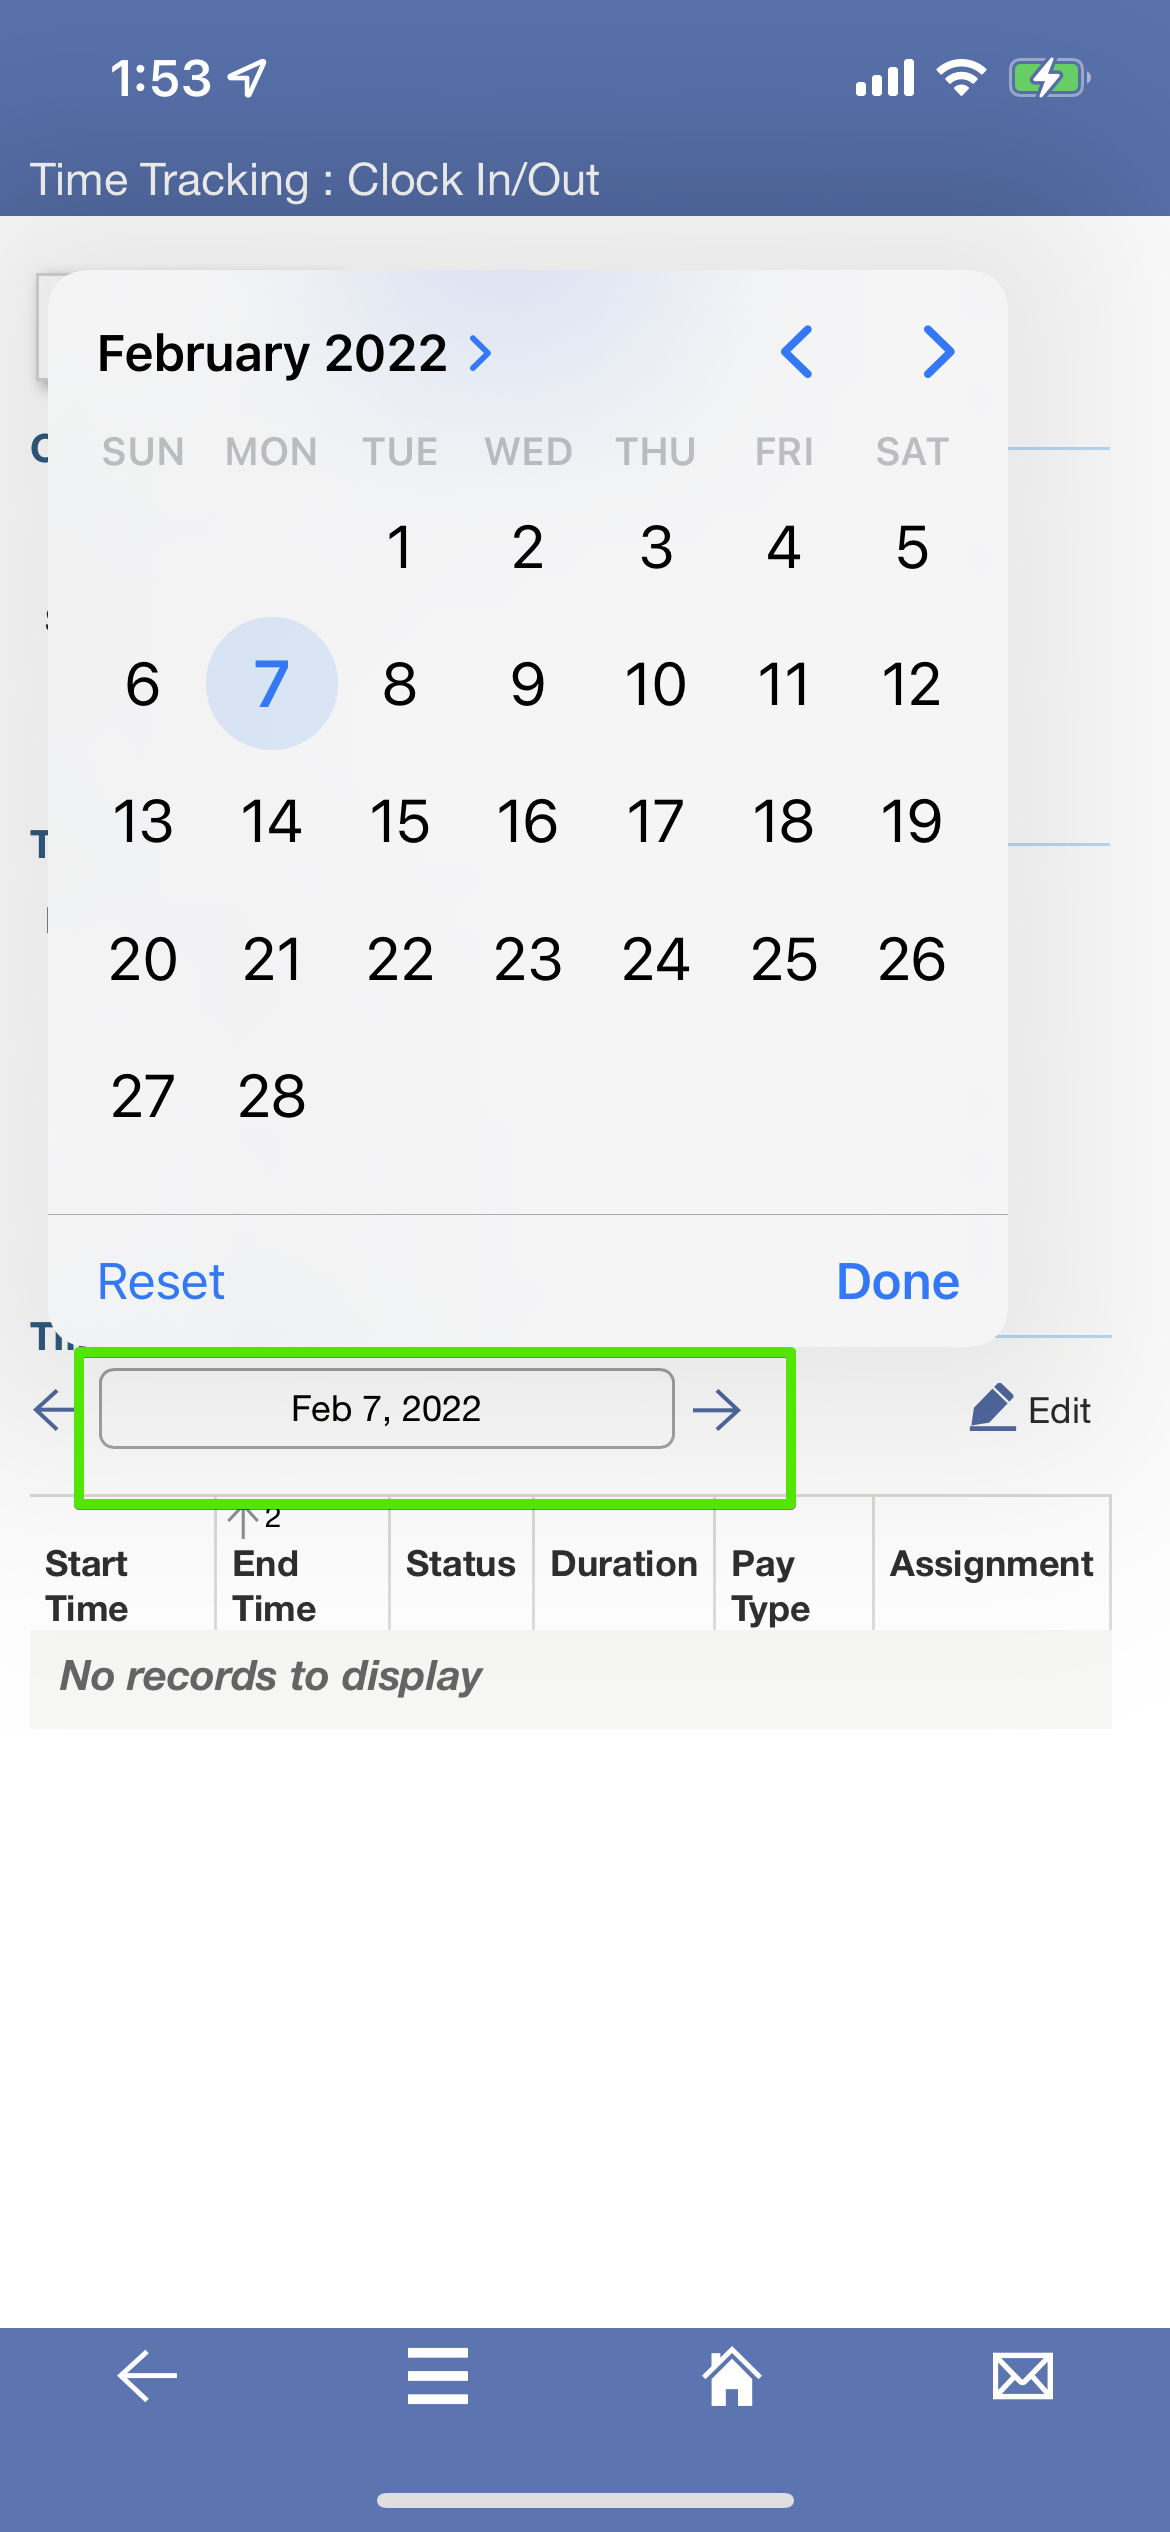
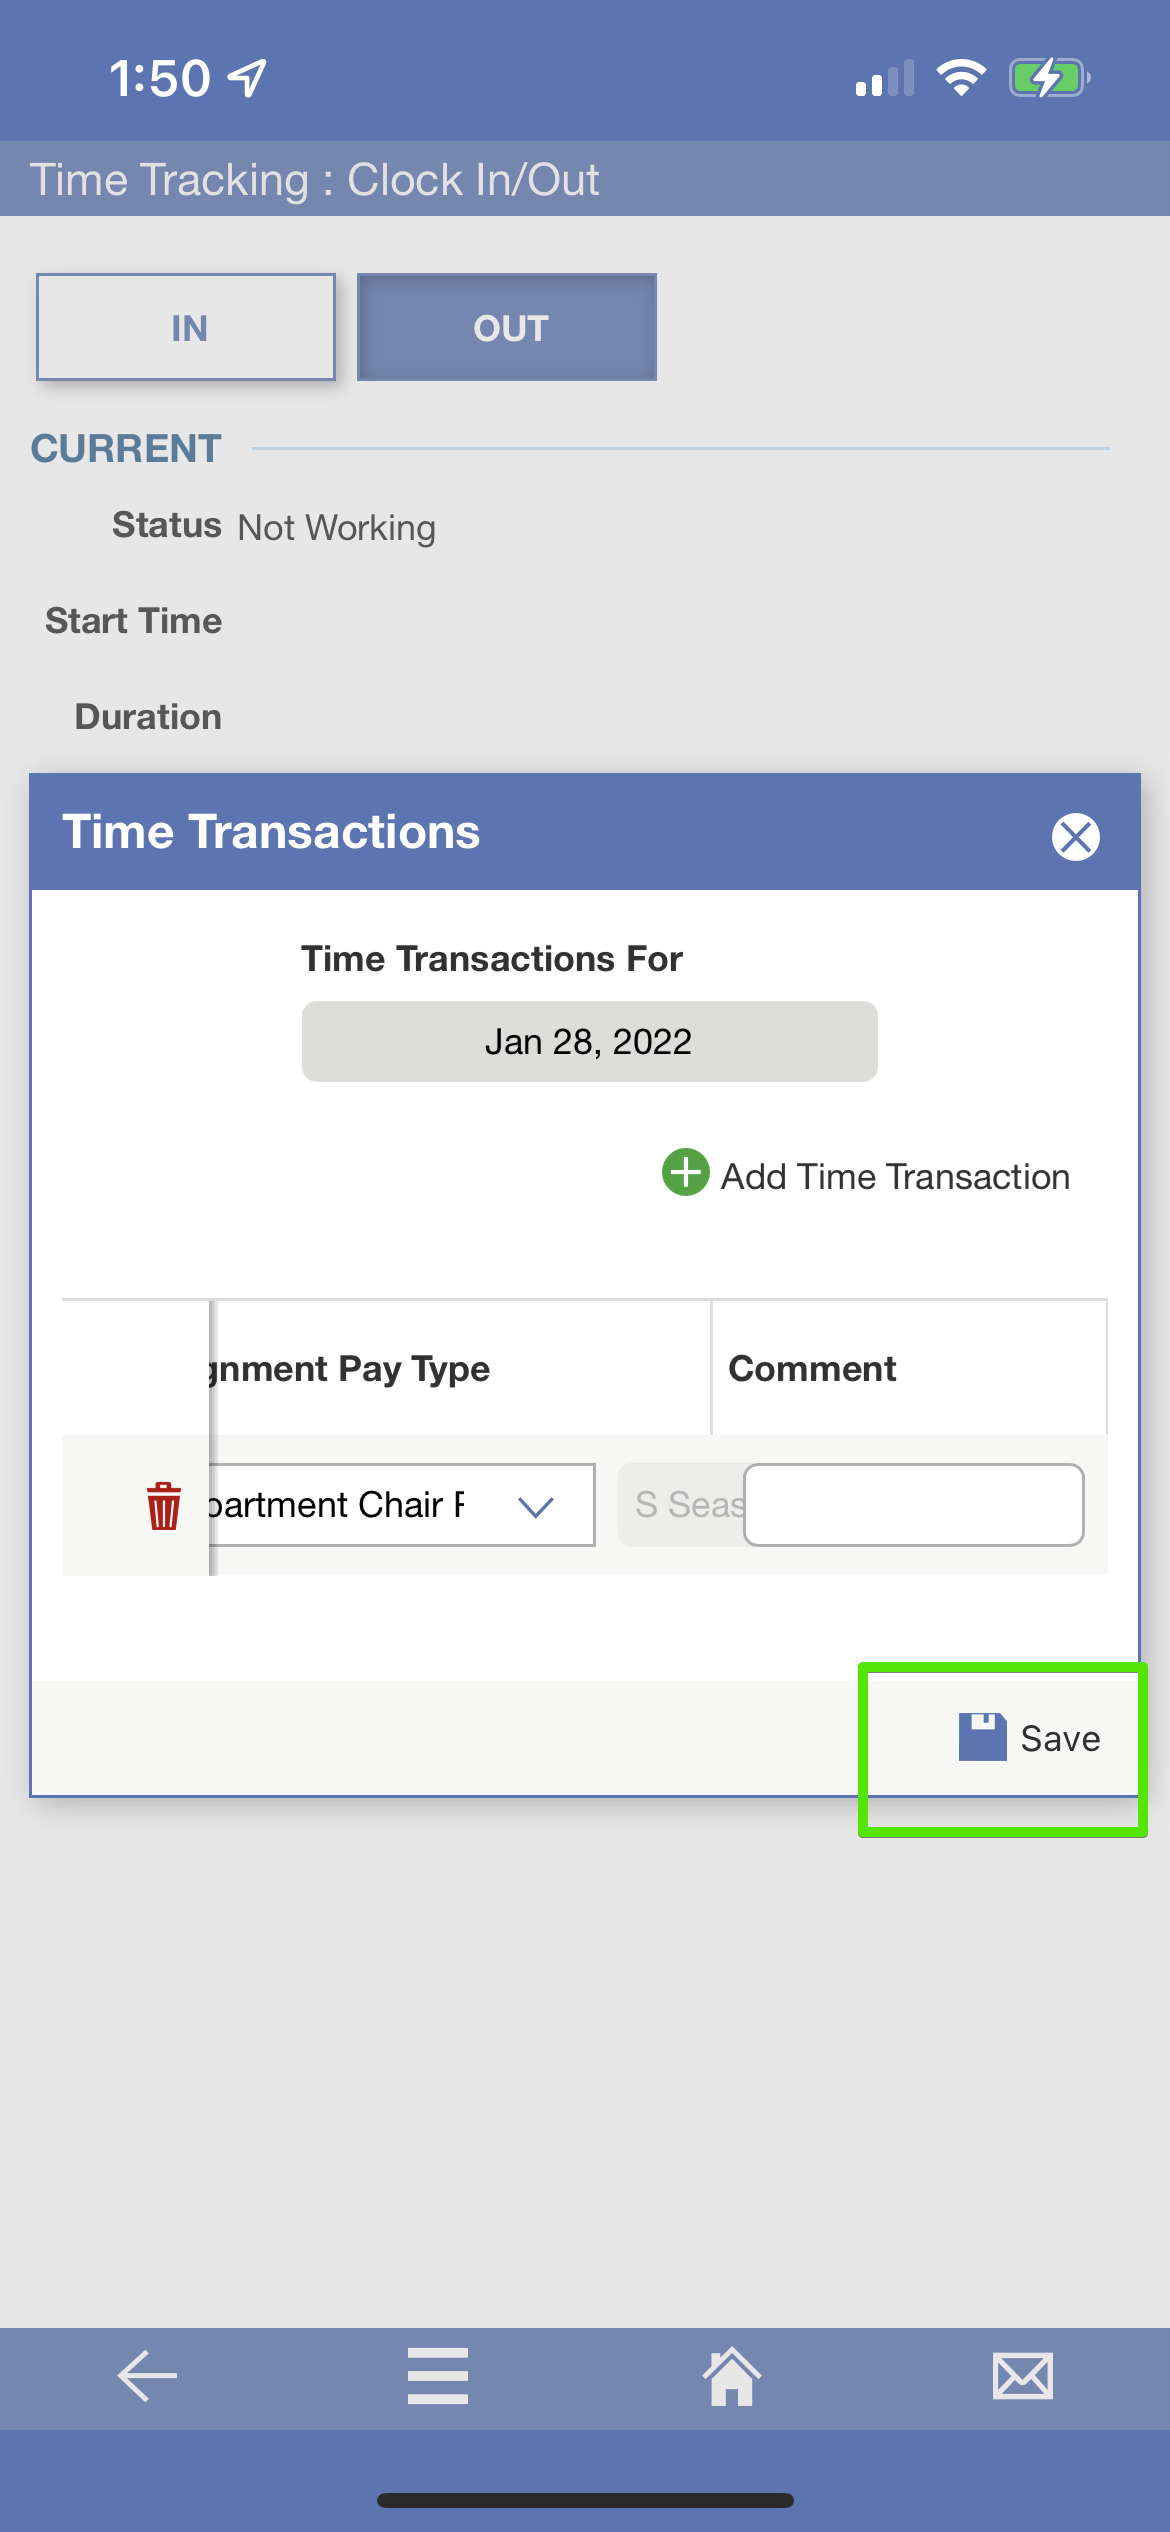
- To adjust the date you are entering for the transaction, click the date in the middle of the screen and select the desired date from the calendar.
- On the Time Transactions menu, enter the Start Time and End Time. If there are multiple entries for the day, click Add Time Transaction. Repeat the same steps to add multiple transactions for the same day.
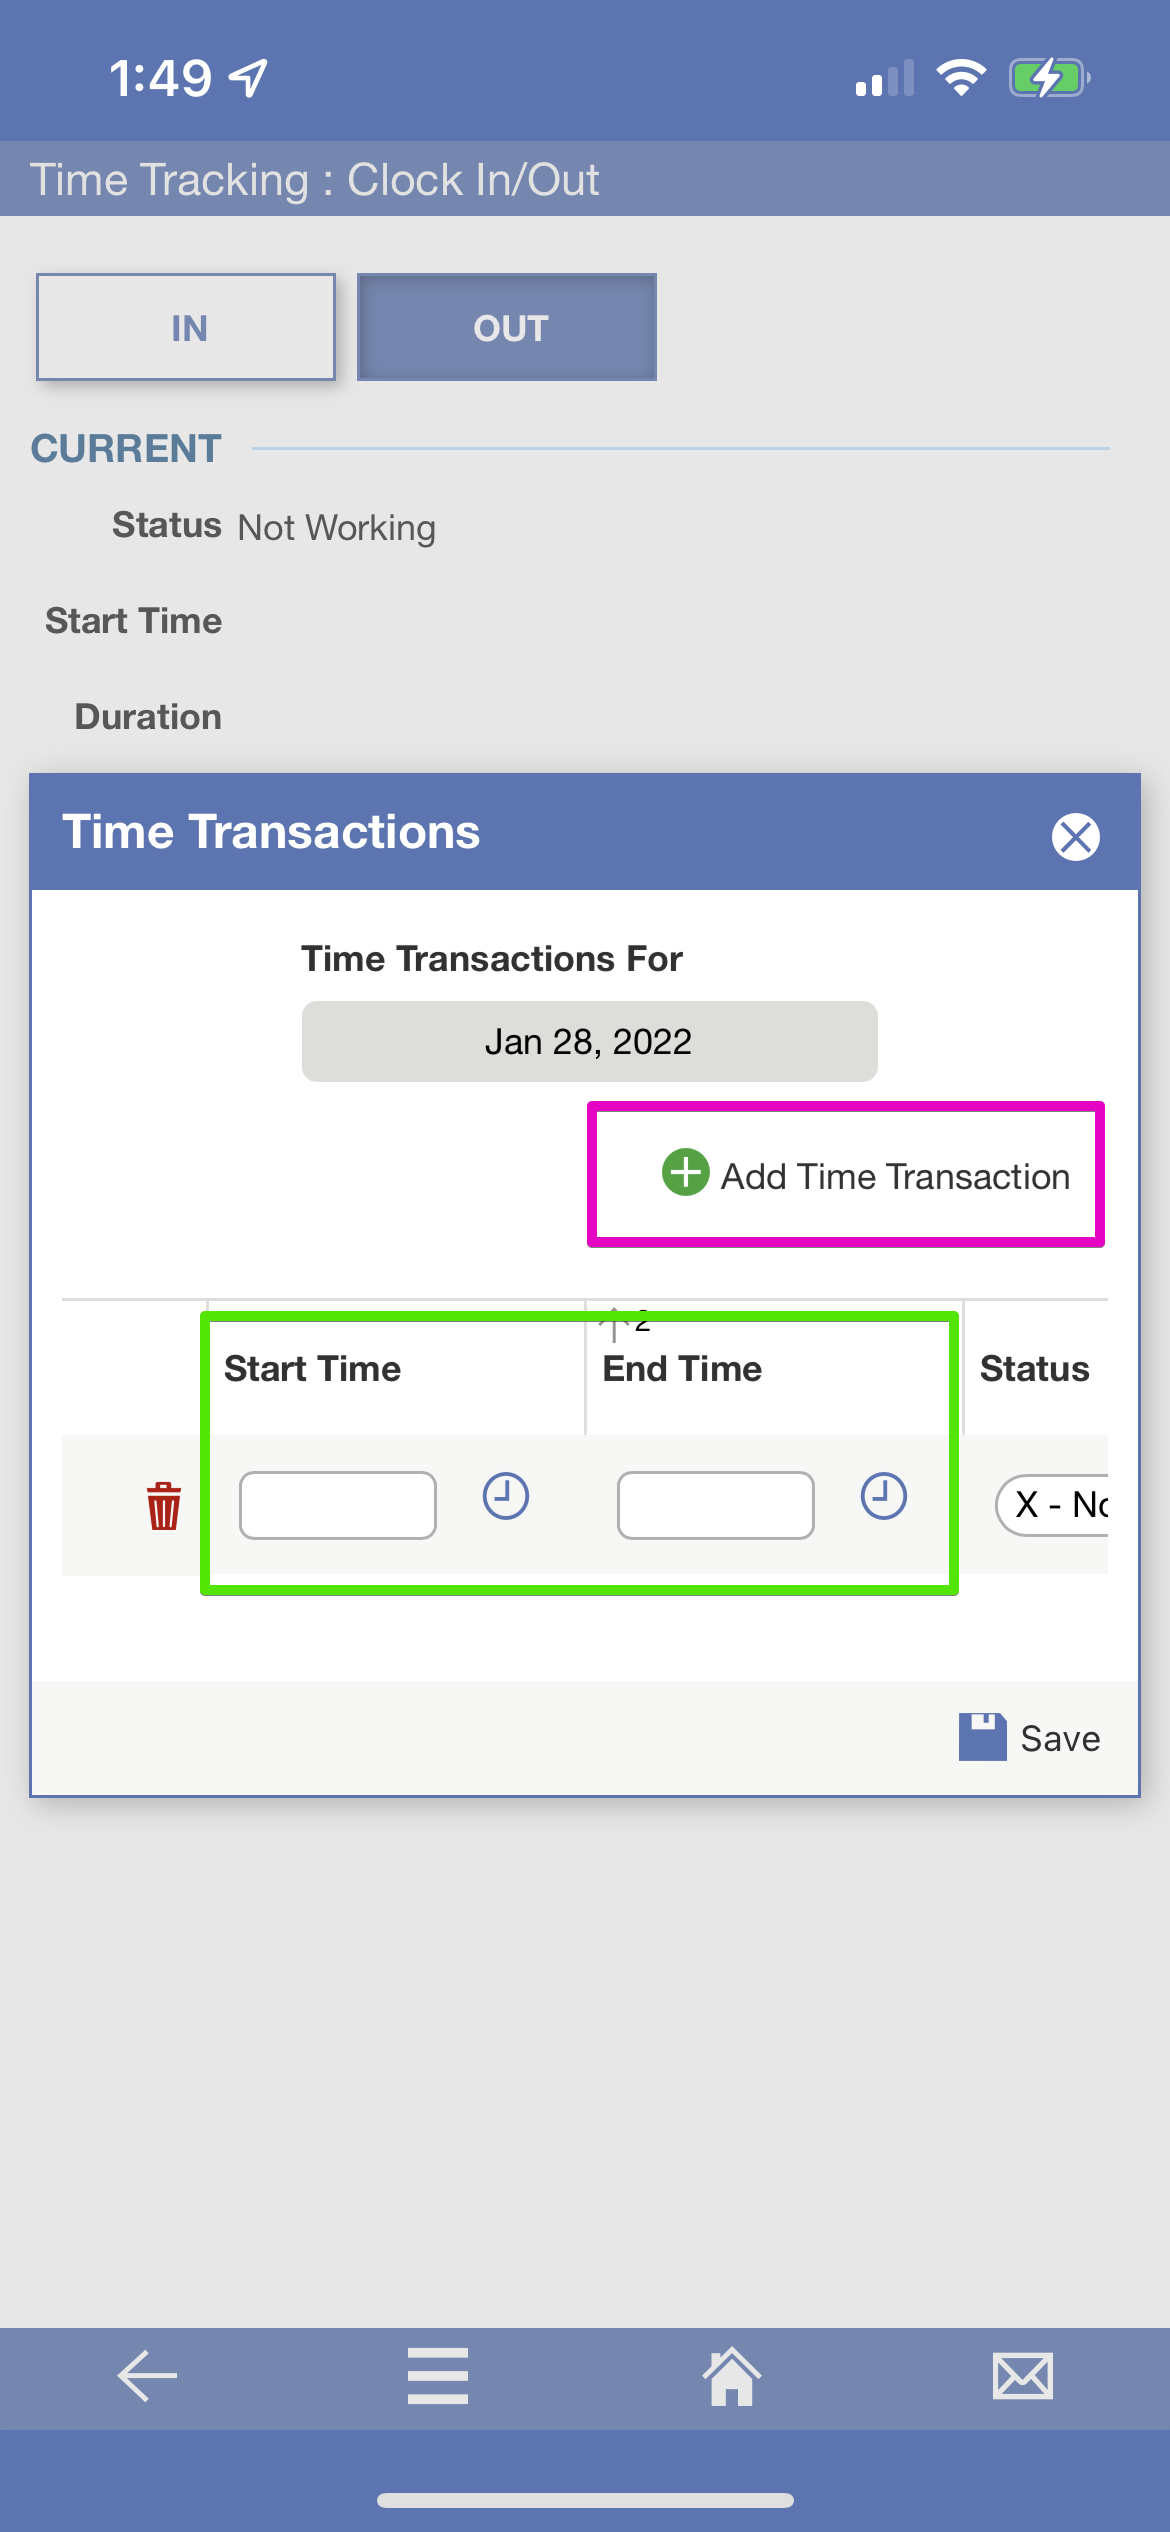
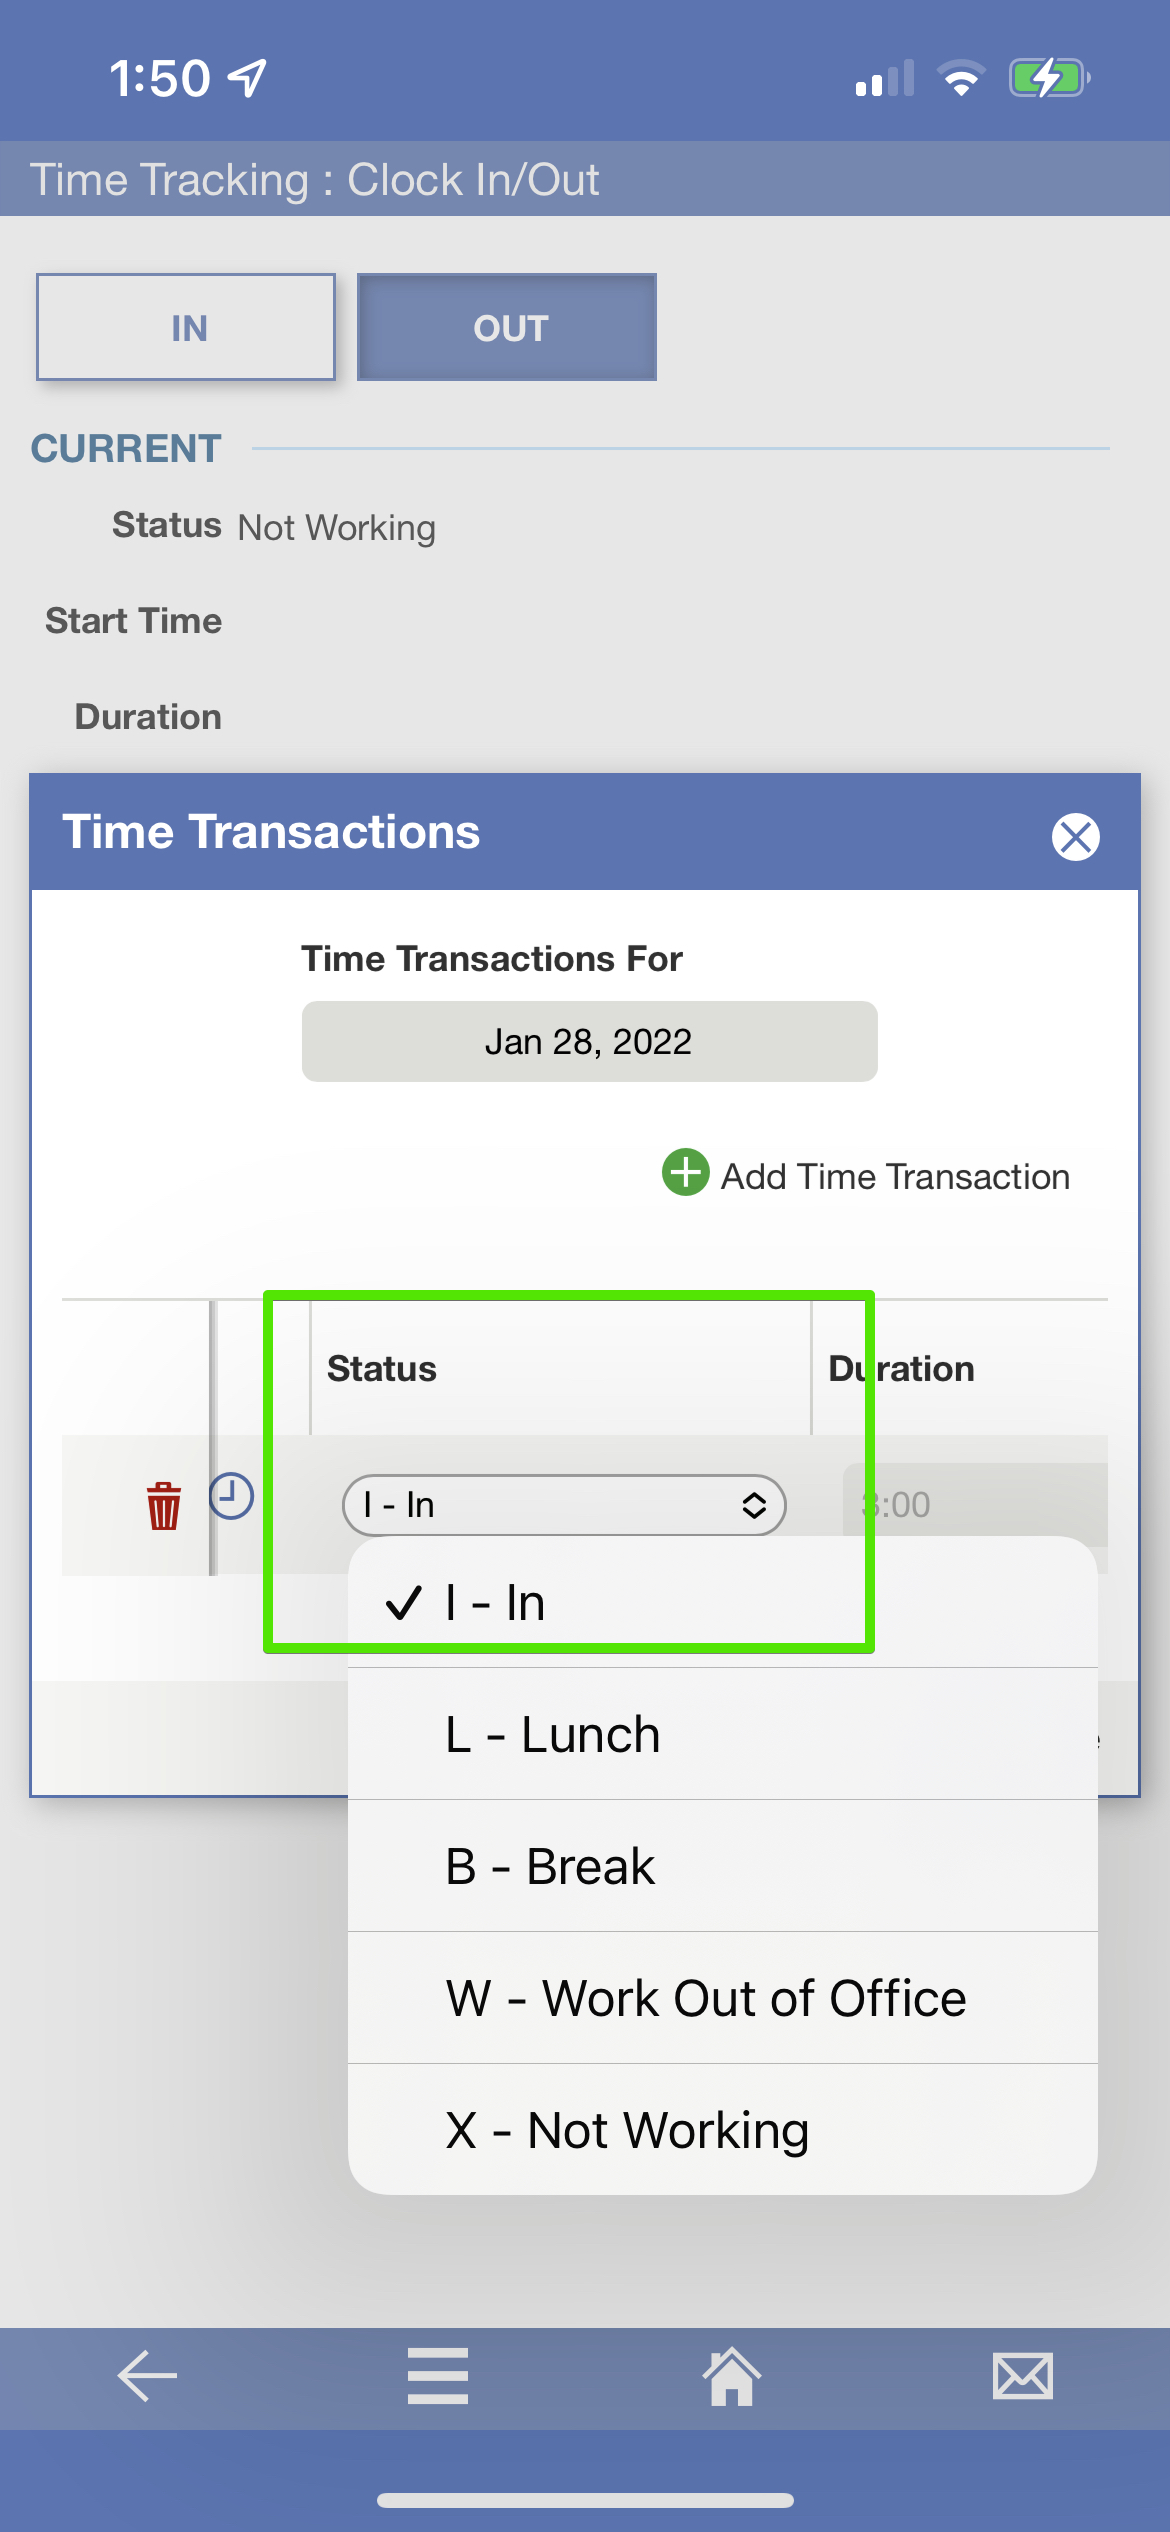
- Slide the transactions menu to the right. On the Status menu, select the appropriate Status type from the dropdown list. Always use the I -In code.
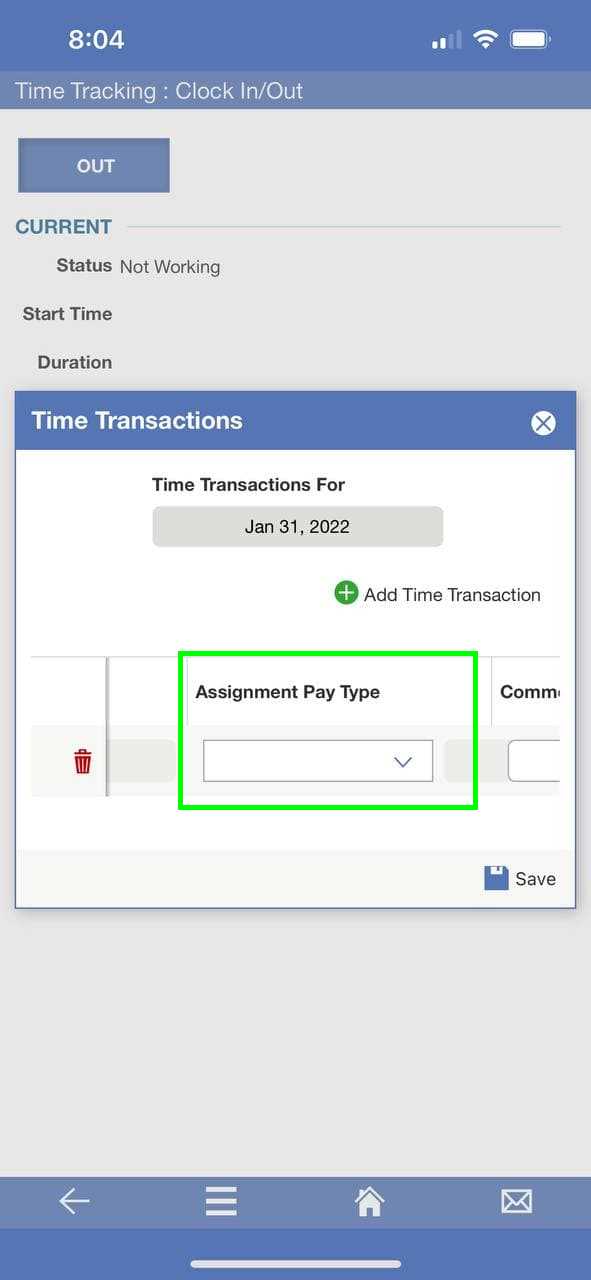
- Slide to the right and click on the dropdown menu for the Assignment Pay Type.
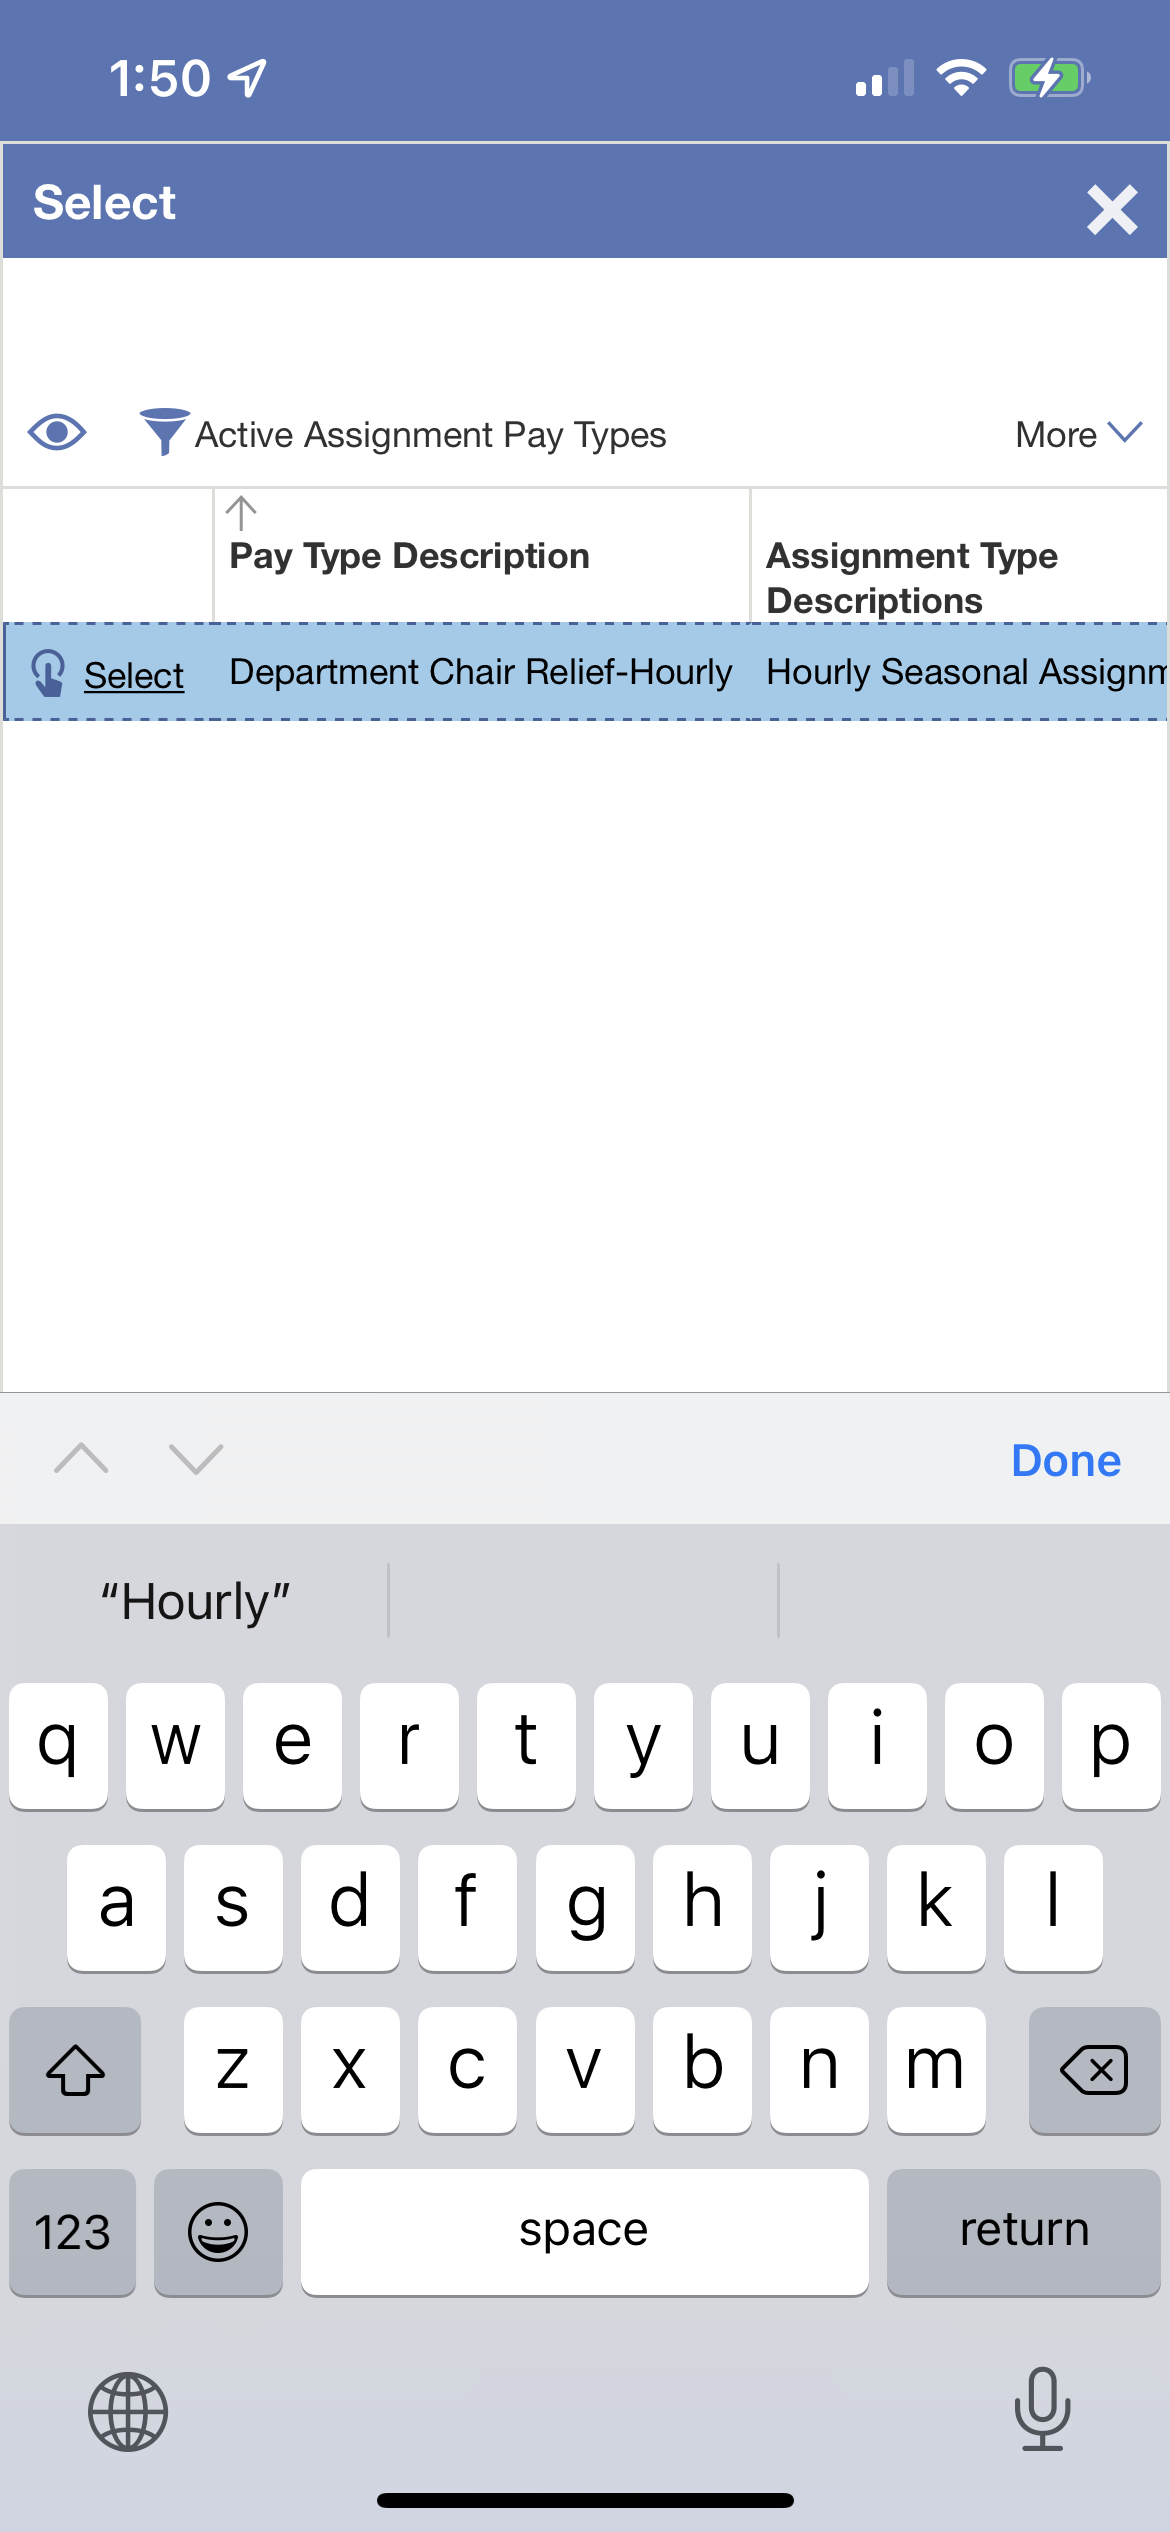
- On the new Window, click Select button next to the pay type this transaction will be for. The only pay types that will show on this menu are the ones eligible for time tracking.
- One the Assignment Pay Type has been selected, click Save.
Submitting Time Tracking Transactions
- From the app’s main page, click the menu button at the bottom of the app (1). Verify that you are on Employee Access (3). If on Administrative Access, click the dropdown menu and select Employee Access (2).
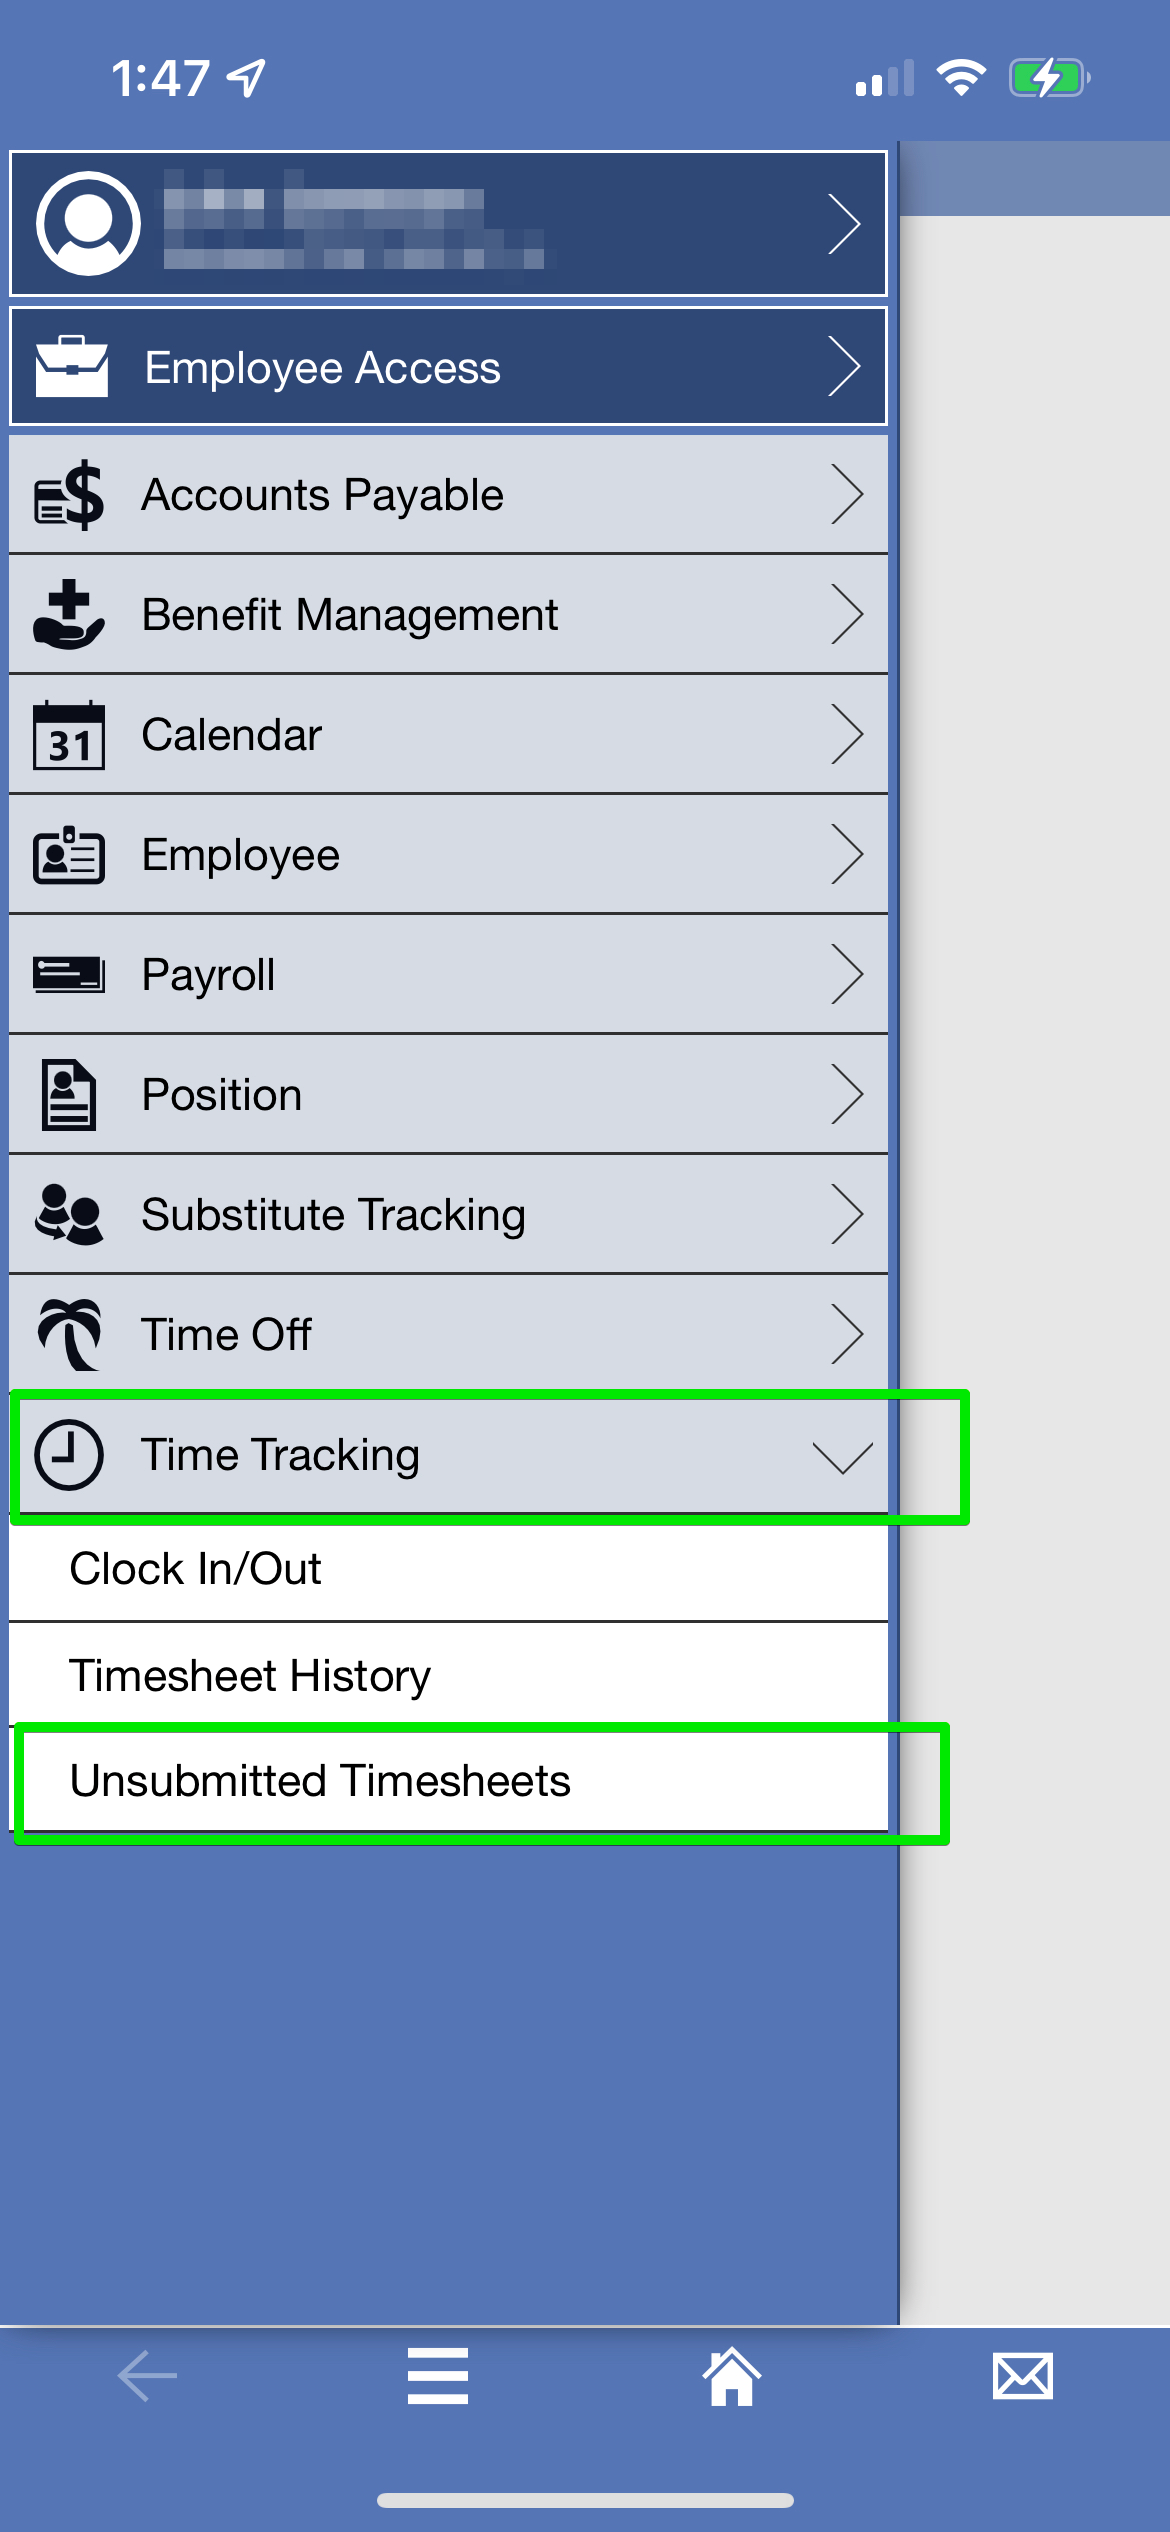
- On the Employee Access menu, click the dropdown next to Time Tracking. Once expanded, click Unsubmitted Timesheets.
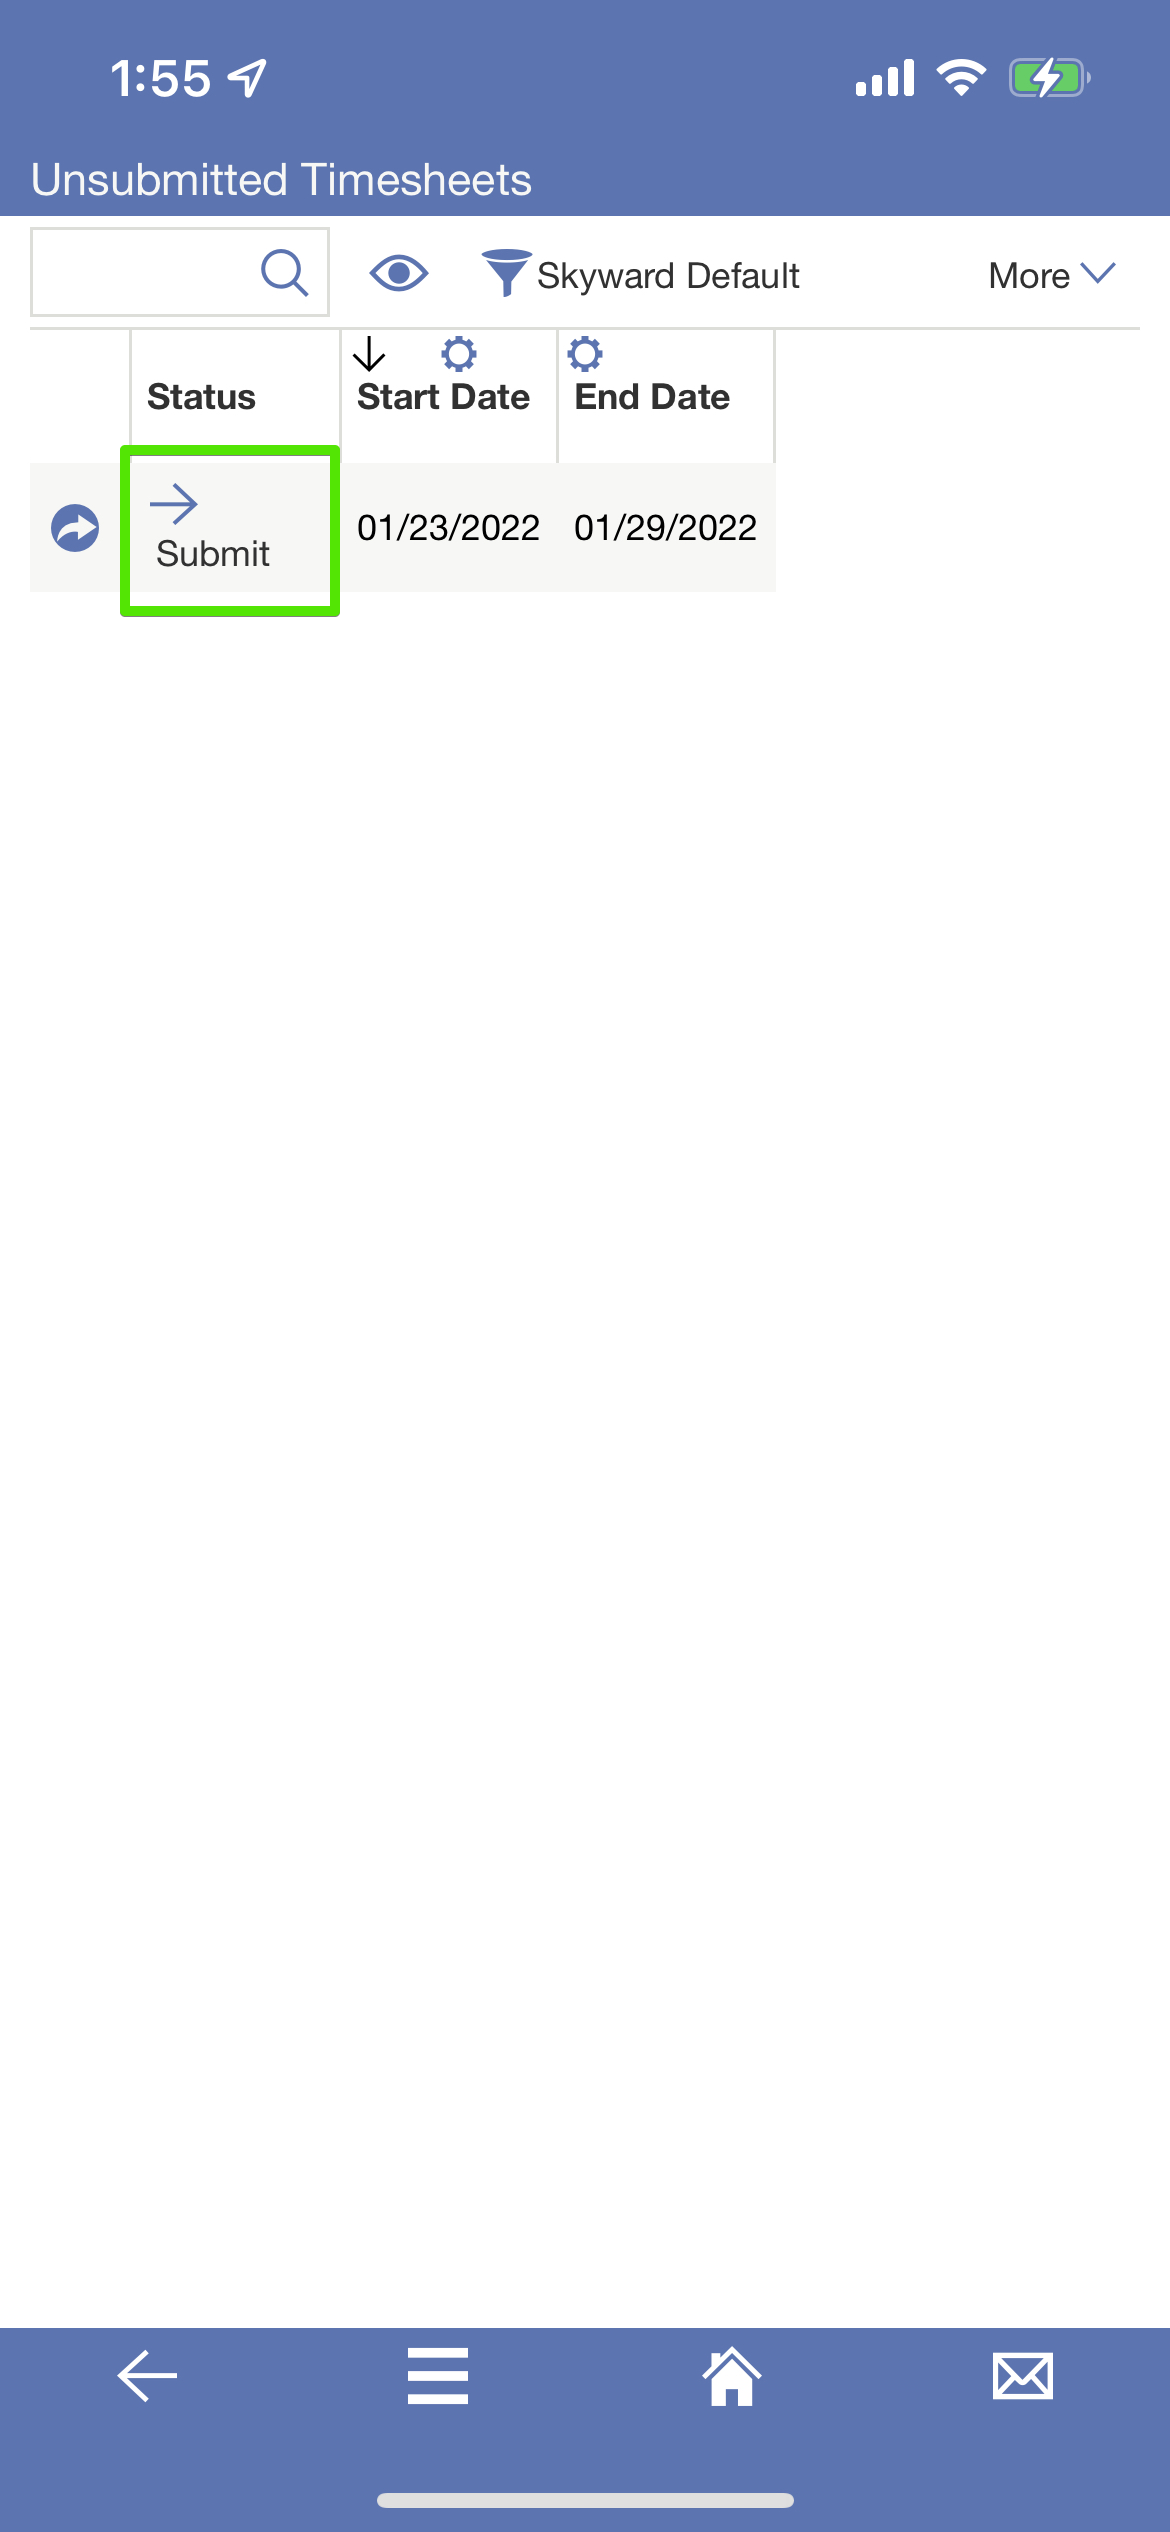
- On the Unsubmitted Timesheets window, click Submit for the timesheet transaction for the specified date range.
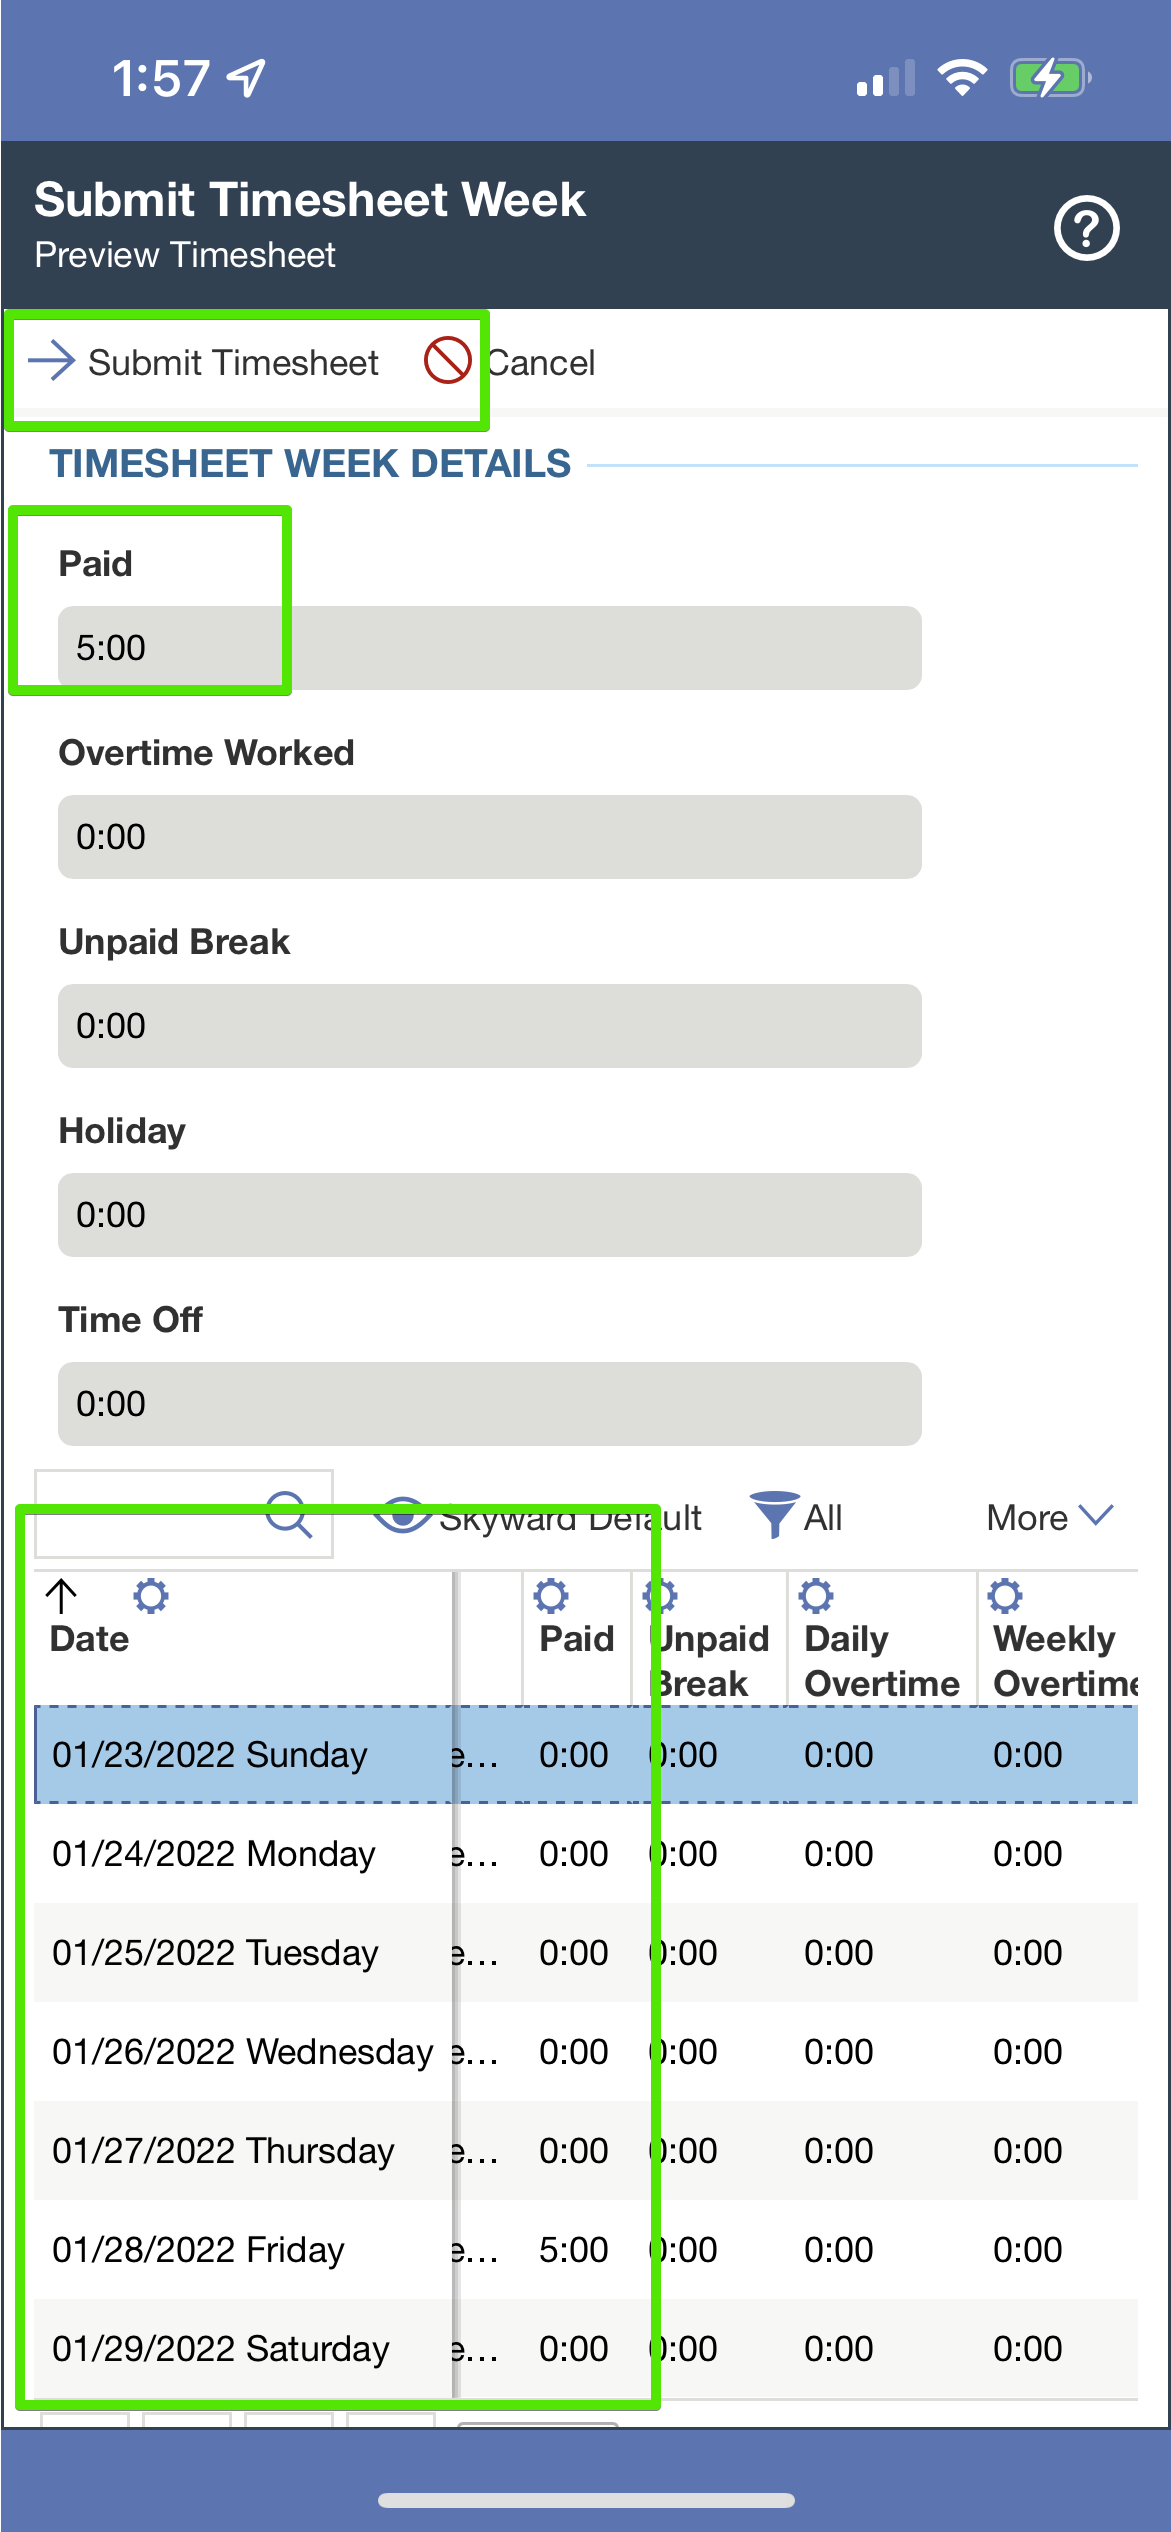
- On the Preview screen, verify that the information is correct. If everything is accurate, click Submit Timesheet. If there is an issue, click Cancel and make the necessary changes.
