PowerSchool contacts work on the idea that there is one version of a contact in the system. This means many contacts need to be consolidated into a single contact. Luckily, PowerSchool has a function to consolidate contacts.
- Log in to PowerSchool
- Select Active students
- Click the Contact tab
- Uncheck Only Show Access Accounts
- Check Filter by Current Student Selection
- Select a letter
- Looking at all the contacts at once will take a very long time to load
- Look through the list of contacts and find any contacts that share the same name and similar contact information
- Please ignore all contacts that are marked Access Account
- Increasing the number at the bottom will make it easier to review the contacts
- Once a duplicate contact found, Click Select by Hand
- Checkboxes are maintained between pages
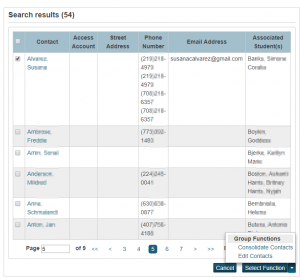
- Checkboxes are maintained between pages
- Select Consolidate Contacts under the select function
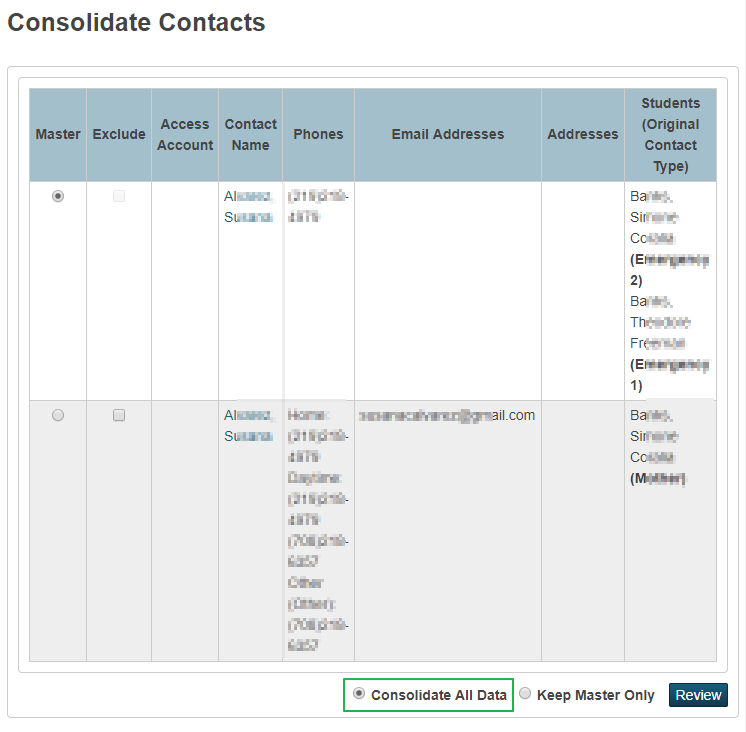
- Select the Master. If given a choice, choose mother or father under the Students (Original Contact Type) for the master.
- Select Consolidate All Data
- Keep Master Only should not be used. There is a possibility of data loss.
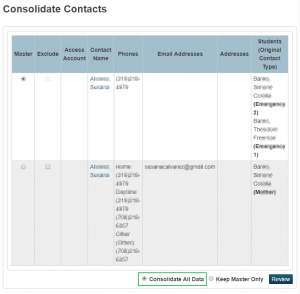
- The next screen will allow a chance to review the information before consolidating.
- Under students, there may be a caution symbol indicating there is a conflict with the student details.
- Click the pencil
- Click the All tab
- Most conflicts can be resolved by combining all the data into the first entry and delete any other entries
- Review the phone numbers
- Deleting any duplicates
- Fixing any formatting issues
- Review the emails
- Deleting any duplicates
- Fixing any formatting issues
- Click Submit Consolidation