In the case of a school-wide evacuation, the evacuation check-in function in PowerSchool will help to scan students in. This function helps the school quickly see how who is at the evacuation site.
- Attach any barcode scanner to your device. (Laptop or iPad, Bluetooth or wired scanner will work.)
- Log into PowerSchool (https://ps.glenbard.org)
- Navigate to the Evacuation Check-in function (Data and Reporting > Reporting > Extended Reports > Functions).
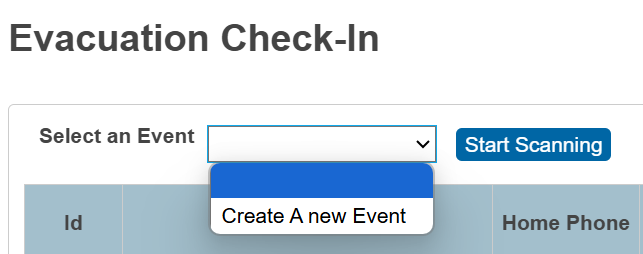
- The first person will choose “Create a new Event” and create the event
- Please follow this name convention: <yyyy-mm-dd> <school> <event>
- Example: 2025-01-01 South New Year Evacuation
- Any additional scanner can select the event from the drop-down even after the event is created.
- The first person will choose “Create a new Event” and create the event
- Click Start Scanning.

- If multiple users are scanning, they are able to scan now as long as they select the same Event Name.
- When finished, click Stop Scanning.
- The report will update after each scan.
- You can view the report in real time on the scanning page.
- The report can also be found: Data and Reporting > Reports > Extended Reports > Functions > Evacuation Check In


Additional Information
The report can be run without scanning by selecting the event, and the information will be loaded. Also, this report is for the current day only.